Sculpt
Choose from 24 sculpt brushes for form building, polishing, cutting, cloth, pose, tube creation, displacement, smoothing and mesh-density work.
Sculpt Mesh combines sculpting, texture painting, masks, SculptGroups, layers, mirroring, profiles, surface snapshots, multires workflows, remeshing and retopology, mesh-library booleans, projection, texture displacement and map baking around the Sculpt Mesh workflow in 3ds Max.
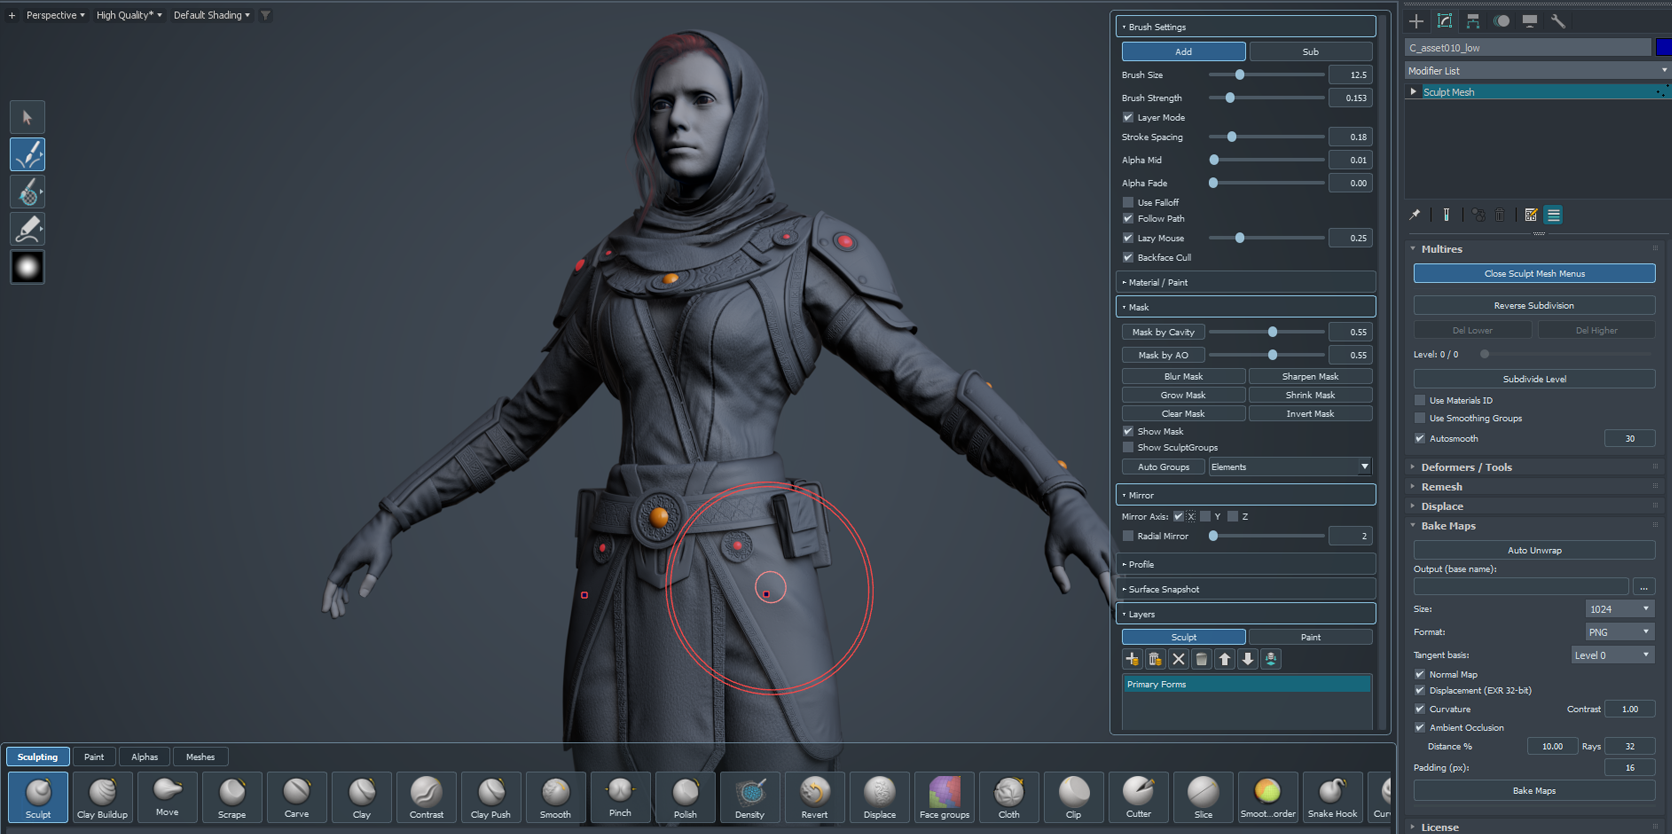
The floating Sculpt Mesh UI is split into a left mode toolbar, a bottom palette and a stack of right-side rollouts. Object-level topology, deformation, displacement and baking operations live in the standard Modify panel.
Choose from 24 sculpt brushes for form building, polishing, cutting, cloth, pose, tube creation, displacement, smoothing and mesh-density work.
Paint through six Paint tools, layered blending, image import, adjustments, stencils, alphas and stroke modes.
Paint, select, blur, grow, shrink, invert and clear masks, then turn masked regions into SculptGroups or use group visibility gestures.
Remesh or retopologize, run one-shot deformers and repair tools, place Mesh Library assets, project detail, apply displacement maps and bake Multires maps.
.dlm into the 3ds Max Plugins folder.Select the polygon object you want to sculpt, then convert it to a Sculpt Mesh object using the supplied command or MacroScript.
The License rollout contains the current license status, Email and Key fields, online actions and offline import tools.
| Control | Purpose |
|---|---|
| Status | Shows the current activation state. |
| Email / Key | Enter the credentials supplied for the license. |
| Activate | Activates using the entered credentials while online. |
| Deactivate | Releases the activation so it can be used on another computer. |
| Copy Computer ID | Copies the current computer identifier for an offline request. |
| Import | Imports an offline .lic file. |
| Request License | Opens the license request page. |
Select a polygon object and convert it to Sculpt Mesh.
Use Open Sculpt Mesh Menus from Multires if the floating UI is closed.
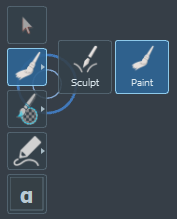
Use the Sculpt/Paint flyout on the left toolbar.
Pick a sculpt brush, Paint tool, alpha or a Mesh Library asset from the bottom palette.
Use the brush, gestures and shortcuts described below. Hold Space for the Quick Menu.
The current UI uses the following rollout order and palette structure.
| Area | Current contents |
|---|---|
| Right-side floating rollouts | Brush Settings, Material / Paint, Mask, Mirror, Profile, Surface Snapshot, Layers. Brush Settings and Layers open expanded. |
| Modify panel rollouts | Multires, Remesh, Deformers / Tools, Displace, Bake Maps, License. |
| Bottom palette tabs | Sculpting, Paint, Alphas, Meshes. |
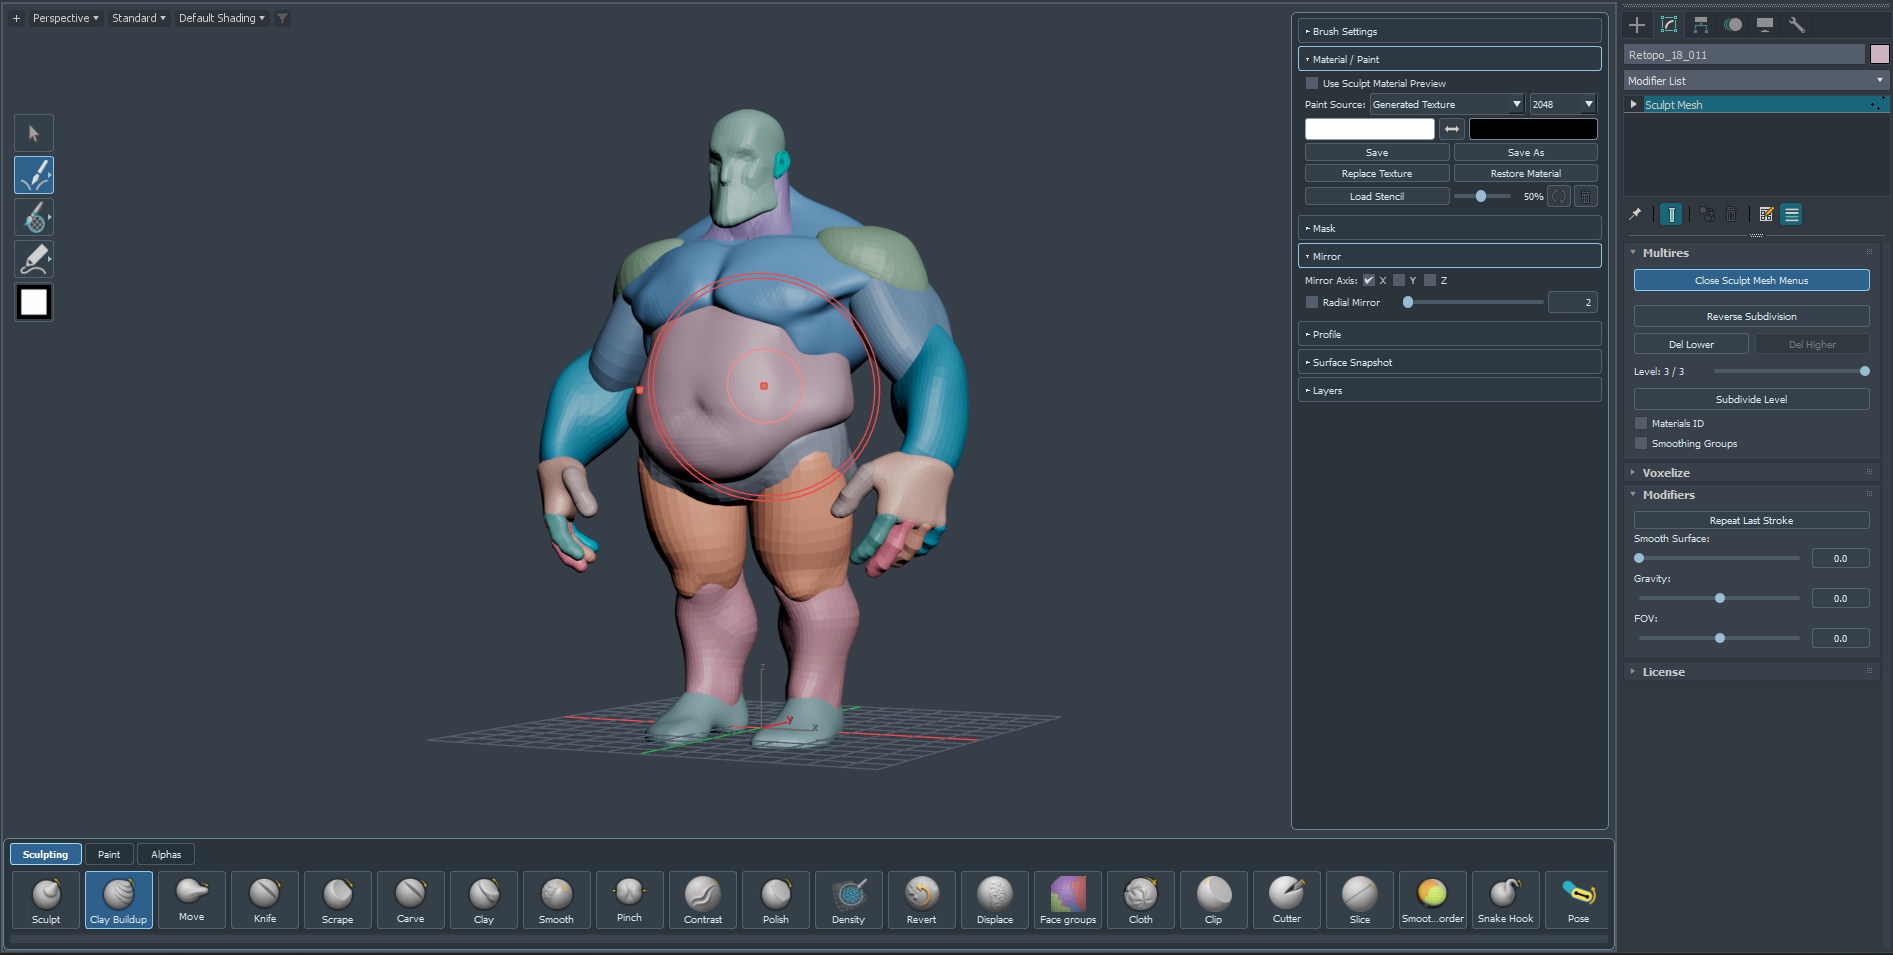
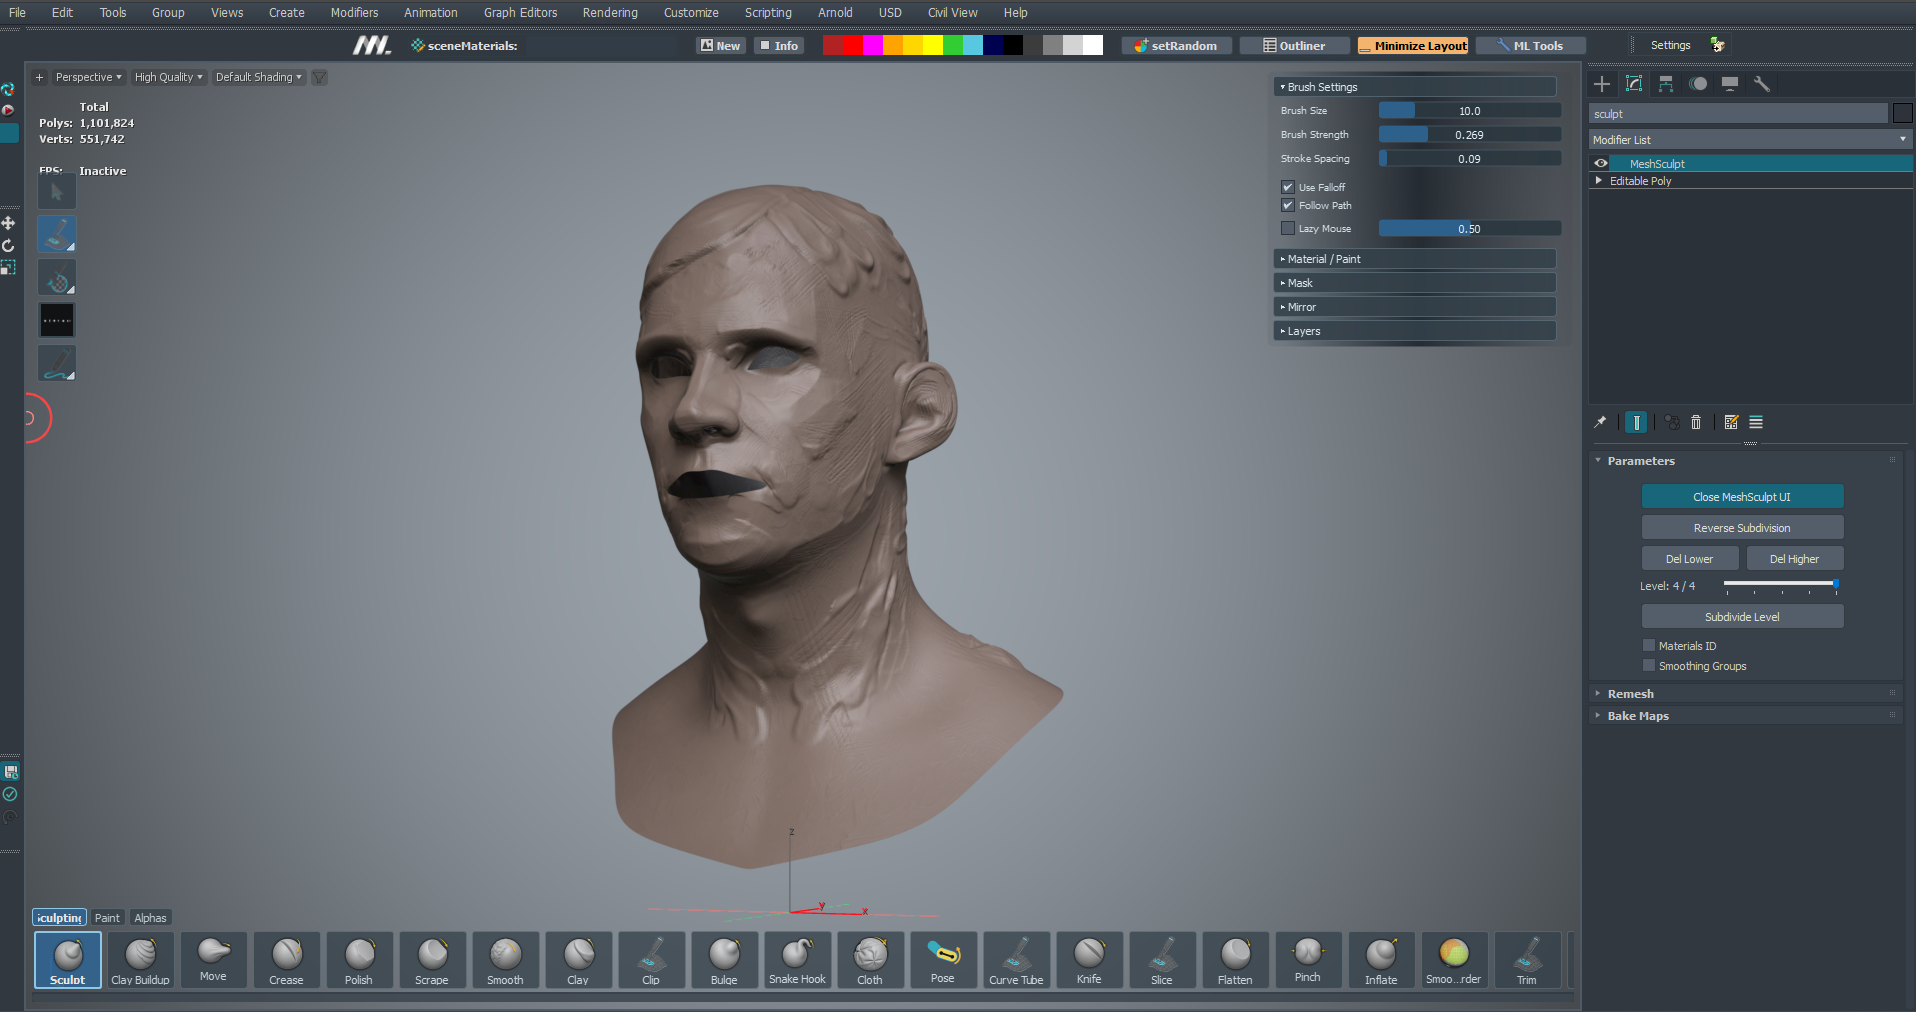
| Left mode toolbar | Select; Sculpt/Paint flyout; Mask flyout; Stroke Mode flyout; active alpha preview. |
| Slot | Contents |
|---|---|
| 1 — Select | Returns to object selection. |
| 2 — Sculpt / Paint | Switches the persistent working mode between Sculpt and Paint. |
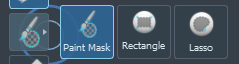
| 3 — Mask | Choose Paint Mask, Rectangle or Lasso. |
| 4 — Stroke Mode | Choose Draw, Stamp, Drag, Color Mix or Scatter. Color Mix is Paint-only; selecting it switches to Paint. |
| 5 — Alpha preview | Shows the active alpha. If none is selected, the preview reports that no alpha texture is selected. |
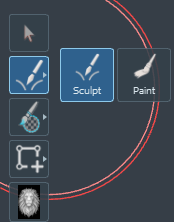
Sculpt, Clay, Clay Buildup, Carve, Knife, Contrast, Scrape, Density, Revert, Face groups, Clip, Cutter, Slice, Snake Hook, Cloth, Pose, Curve Tube, Move, Polish, Pinch, Inflate, Displace, Smooth, Smooth SG Border.
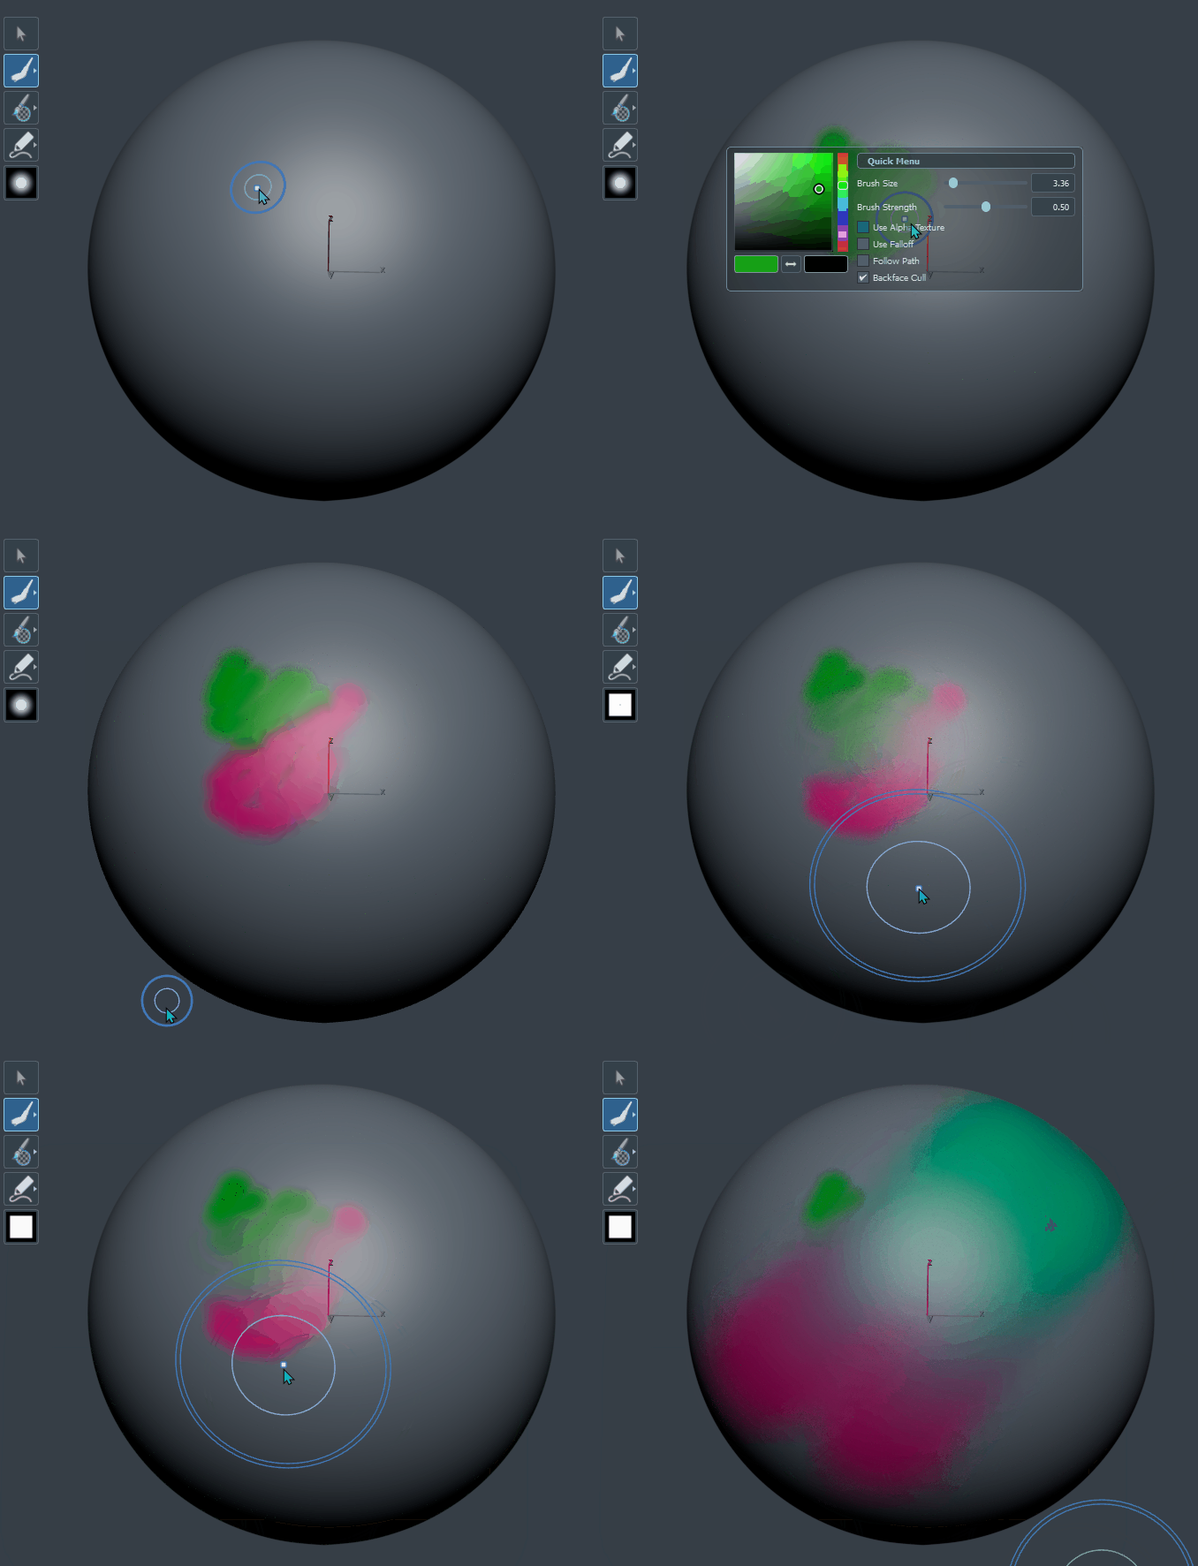
Paint, Smudge, Fill, Blur, Erase, Gradient.
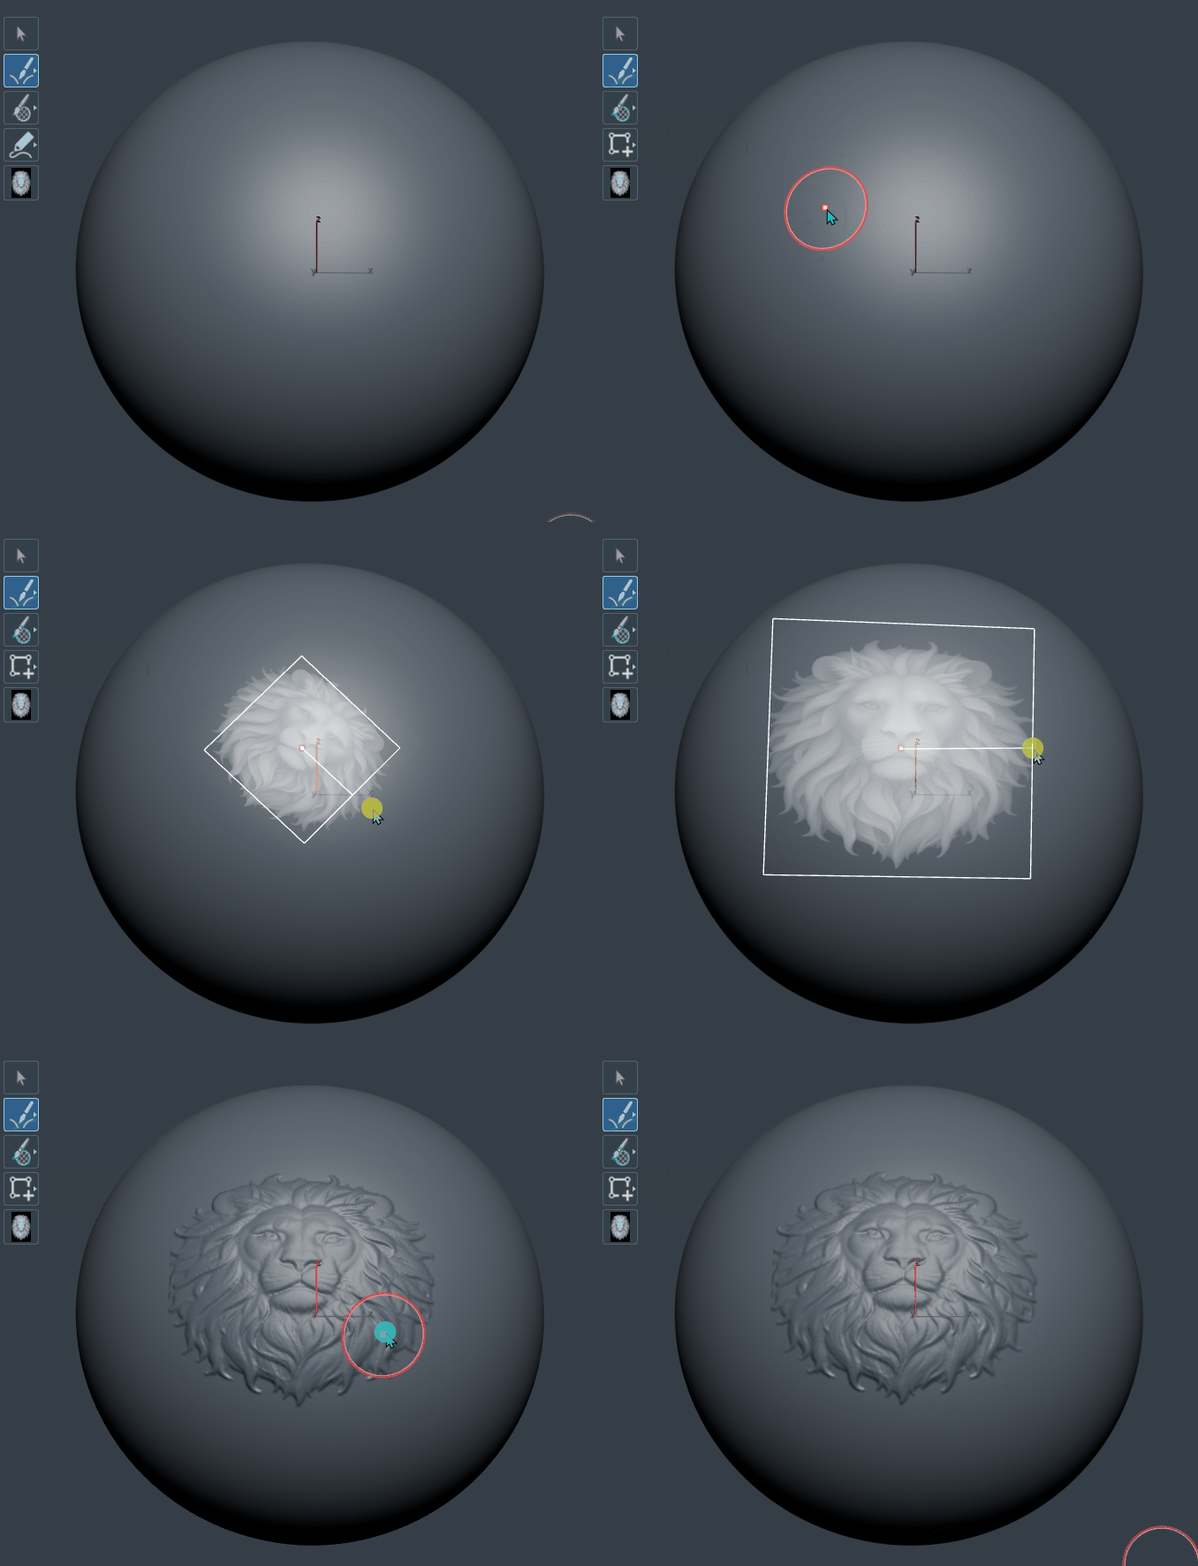
Starts with No Alpha and the four built-in alphas, then adds a custom library with categories and Favorites. Right-click a custom alpha to use it as an Alpha, Stencil or Displacement map.
The Meshes page is the Mesh Library: choose a library folder, browse sub-folder categories or Favorites, save selected scene objects as reusable assets and arm an asset for surface placement.
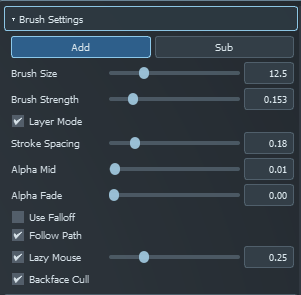
The rollout changes with the active brush, Paint tool, Stroke Mode and alpha. Only controls that apply to the current context are shown.
| Context | Controls |
|---|---|
| Sculpt direction | Add and Sub define the base direction for supported signed sculpt brushes. Alt temporarily flips that direction. For Ctrl+Alt straight-line strokes, the selected Add/Sub state is used because Alt belongs to the straight-line chord. |
| Common | Brush Size, Stroke Spacing, Use Falloff, Follow Path, Lazy Mouse and its amount, plus Backface Cull. |
| Backface Cull | Is remembered per brush. Move starts with it off so geometry inside the brush radius can be grabbed even when the brush center is beside the visible surface. |
| Sculpt | Brush Strength plus any brush-specific controls listed below. |
| Paint | Opacity and Hardness. Brush Strength is not shown in Paint. Blur Strength appears while the Blur Paint tool is active. |
| Active alpha | Alpha Mid and Alpha Fade appear when an alpha is active where supported. |
| Clay | Border controls the Clay brush border profile. |
| Polish | Polish Hardness. |
| Move | AccuCurve. |
| Sculpt / Displace brush | Layer Mode. When enabled, a stroke settles toward one height so overlapping parts of the same stroke do not keep building. When disabled, repeated passes in the same stroke continue to accumulate. |
| Scrape | Use Original Plane and Use Original Normal. |
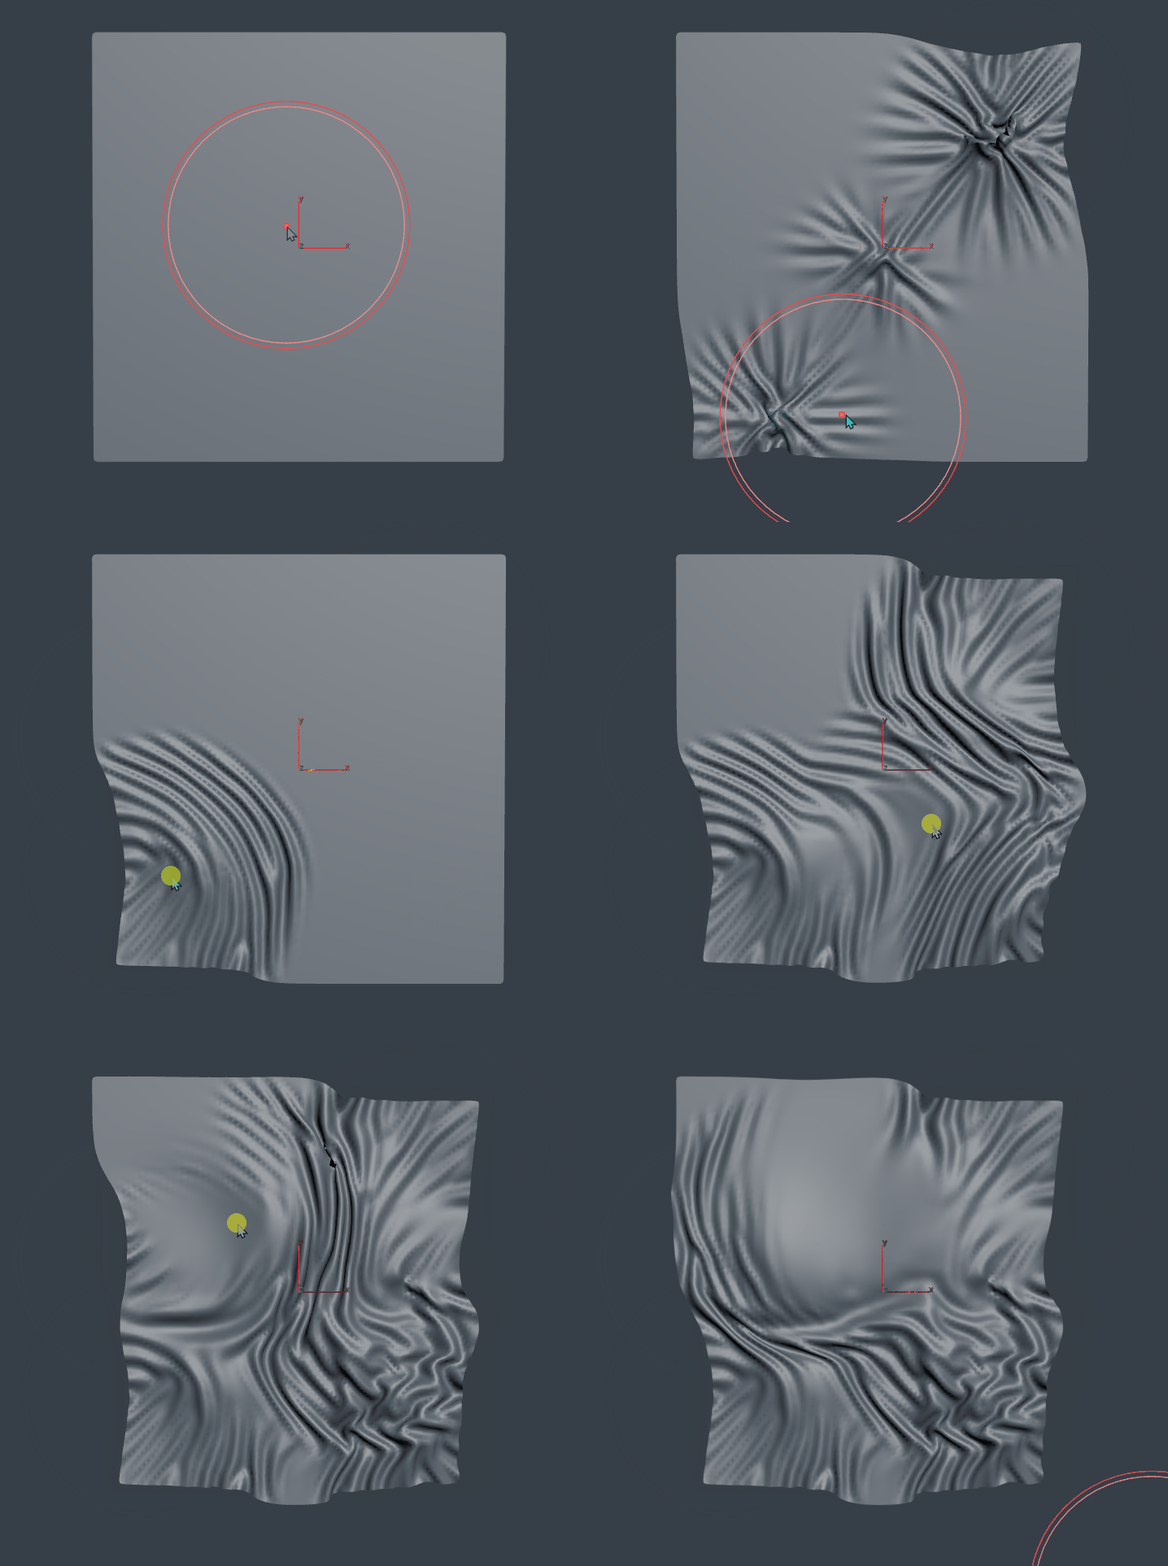
| Cloth | Cloth Iterations, Cloth Damping, Cloth Plasticity, Cloth Bendiness, Fold Size, Fold Strength, Bend Stiffness, Simulation Area, Move Strength, Gravity, Pressure and Pin Boundary. |
| Pose | Deformation, Rotation Origins, Pose Origin Offset, Smooth Iterations, Pose IK Segments, Keep Anchor Point and Connected Only. |
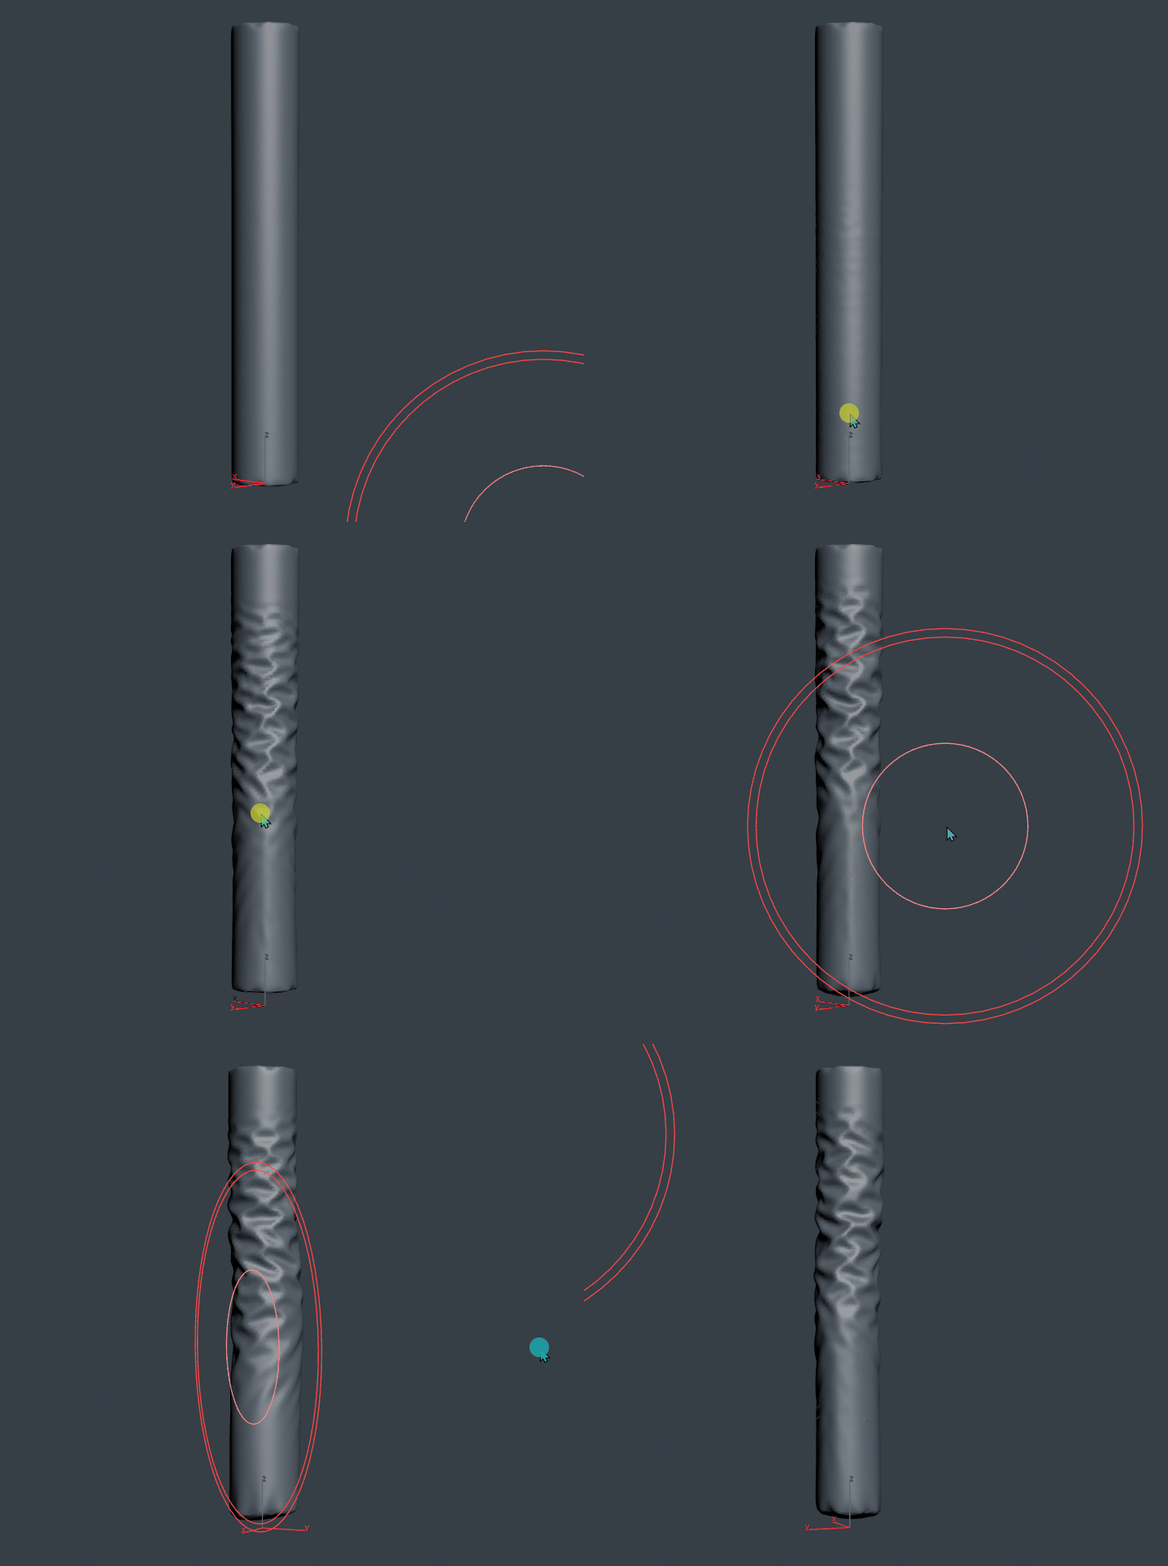
| Curve Tube | Tube Sides, Point Spacing, Surface Offset and Pick Section Shape. A picked closed spline becomes the cross-section; edits to that shape update the live tube. Tube Sides is ignored while a section shape is in use. |
| Scatter Stroke Mode | Scatter Density, Scatter Radius, Size Jitter and Amount Jitter. In Paint, Color Jitter A/B is also available. Amount Jitter varies strength in Sculpt and opacity in Paint. |
| Displace brush | Height Mid sets the neutral stencil height and Displace Fade controls the radial transition. Alt reverses the displacement. |
This rollout controls material preview, paint texture source, colors, saving and stencil use.
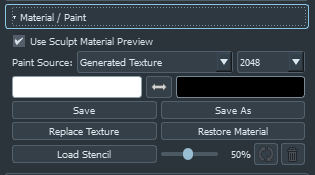
| Control | What it does |
|---|---|
| Use Sculpt Material Preview | Toggles the sculpt material preview. |
| Paint Source | Choose Generated Texture or Existing Diffuse Texture. Generated Texture exposes a resolution selector. |
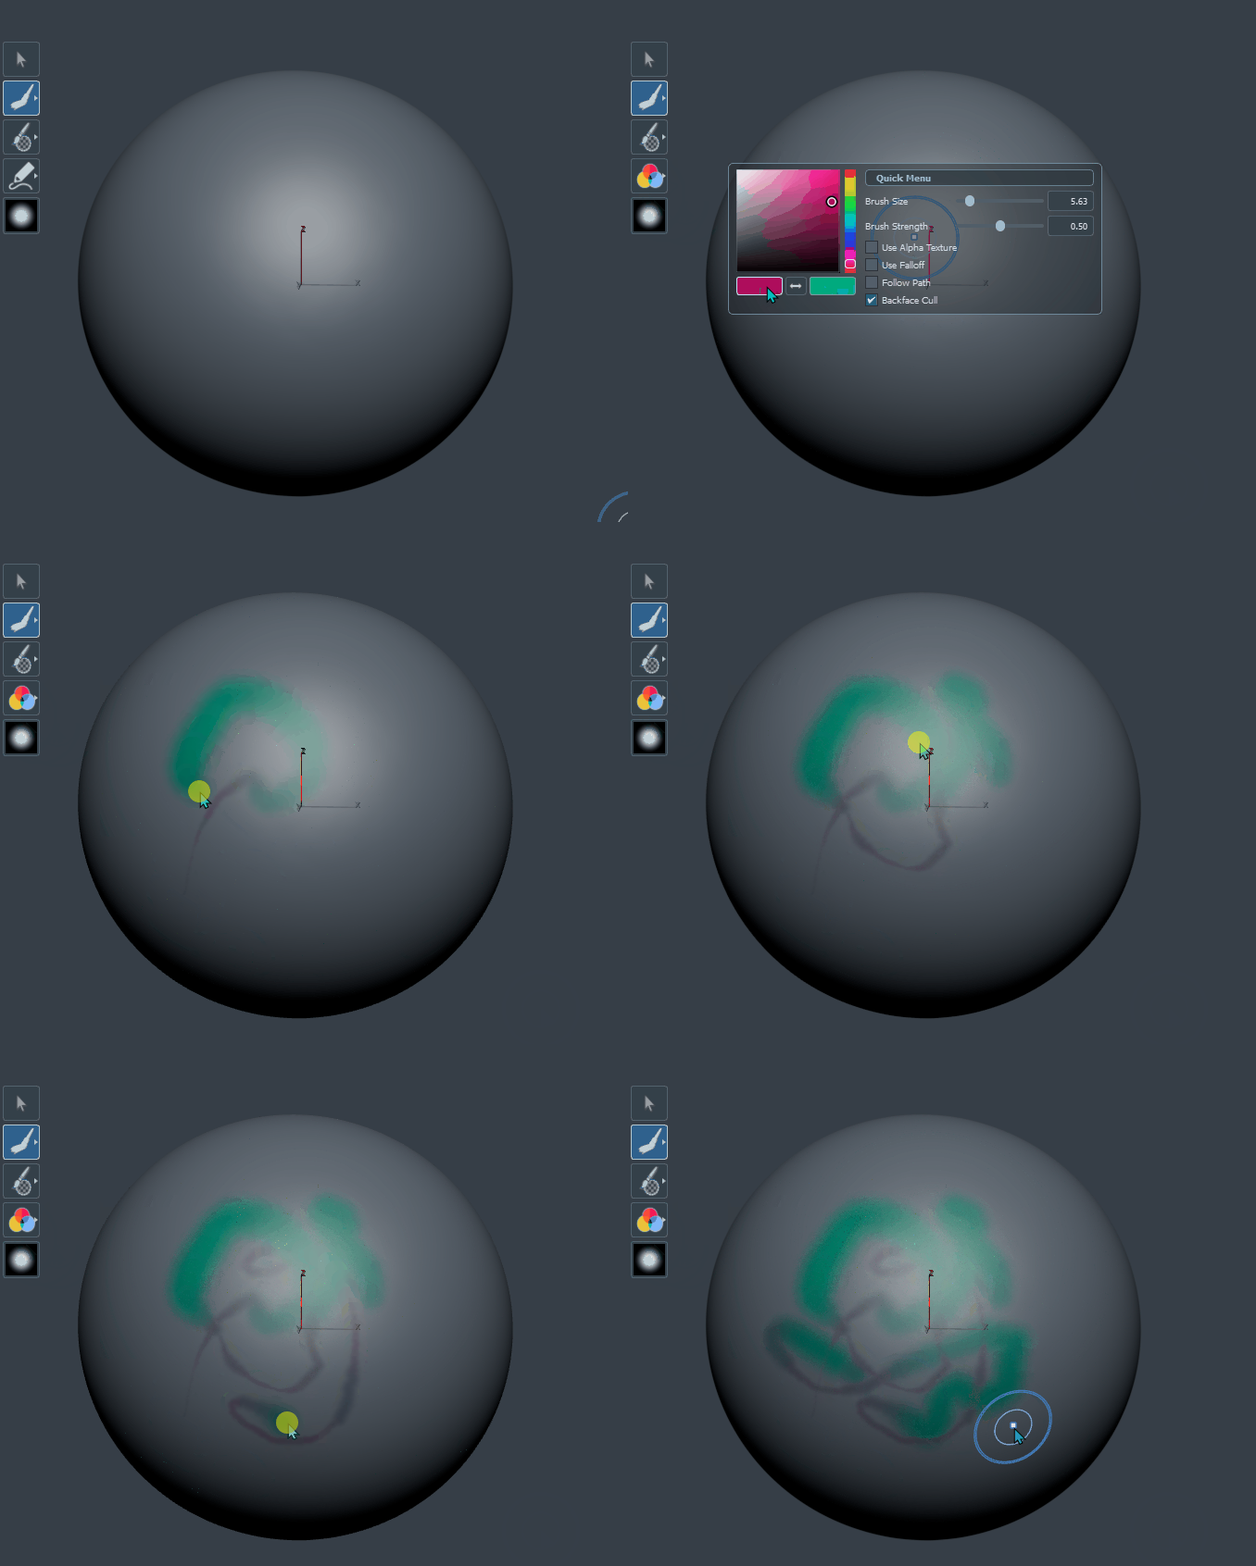
| Color A / Color B | Primary and secondary paint colors. Color B is used by Gradient, Color Mix and Paint Scatter color variation. |
| Swap | Swaps Color A and Color B. |
| Save | Saves the current paint texture to its existing path. |
| Save As | Saves to a new image file. |
| Replace Texture | Loads another texture into the paint workflow. |
| Restore Material | Restores the original material setup. |
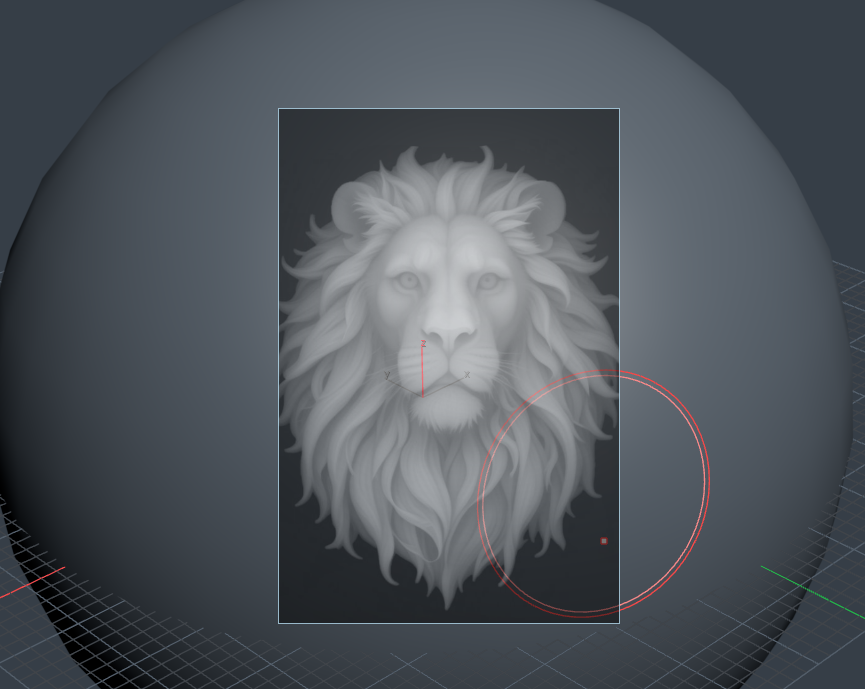
| Load Stencil | Loads an image for stencil-based painting or displacement. |
| Stencil opacity | Adjusts stencil visibility from 5% to 100%. |
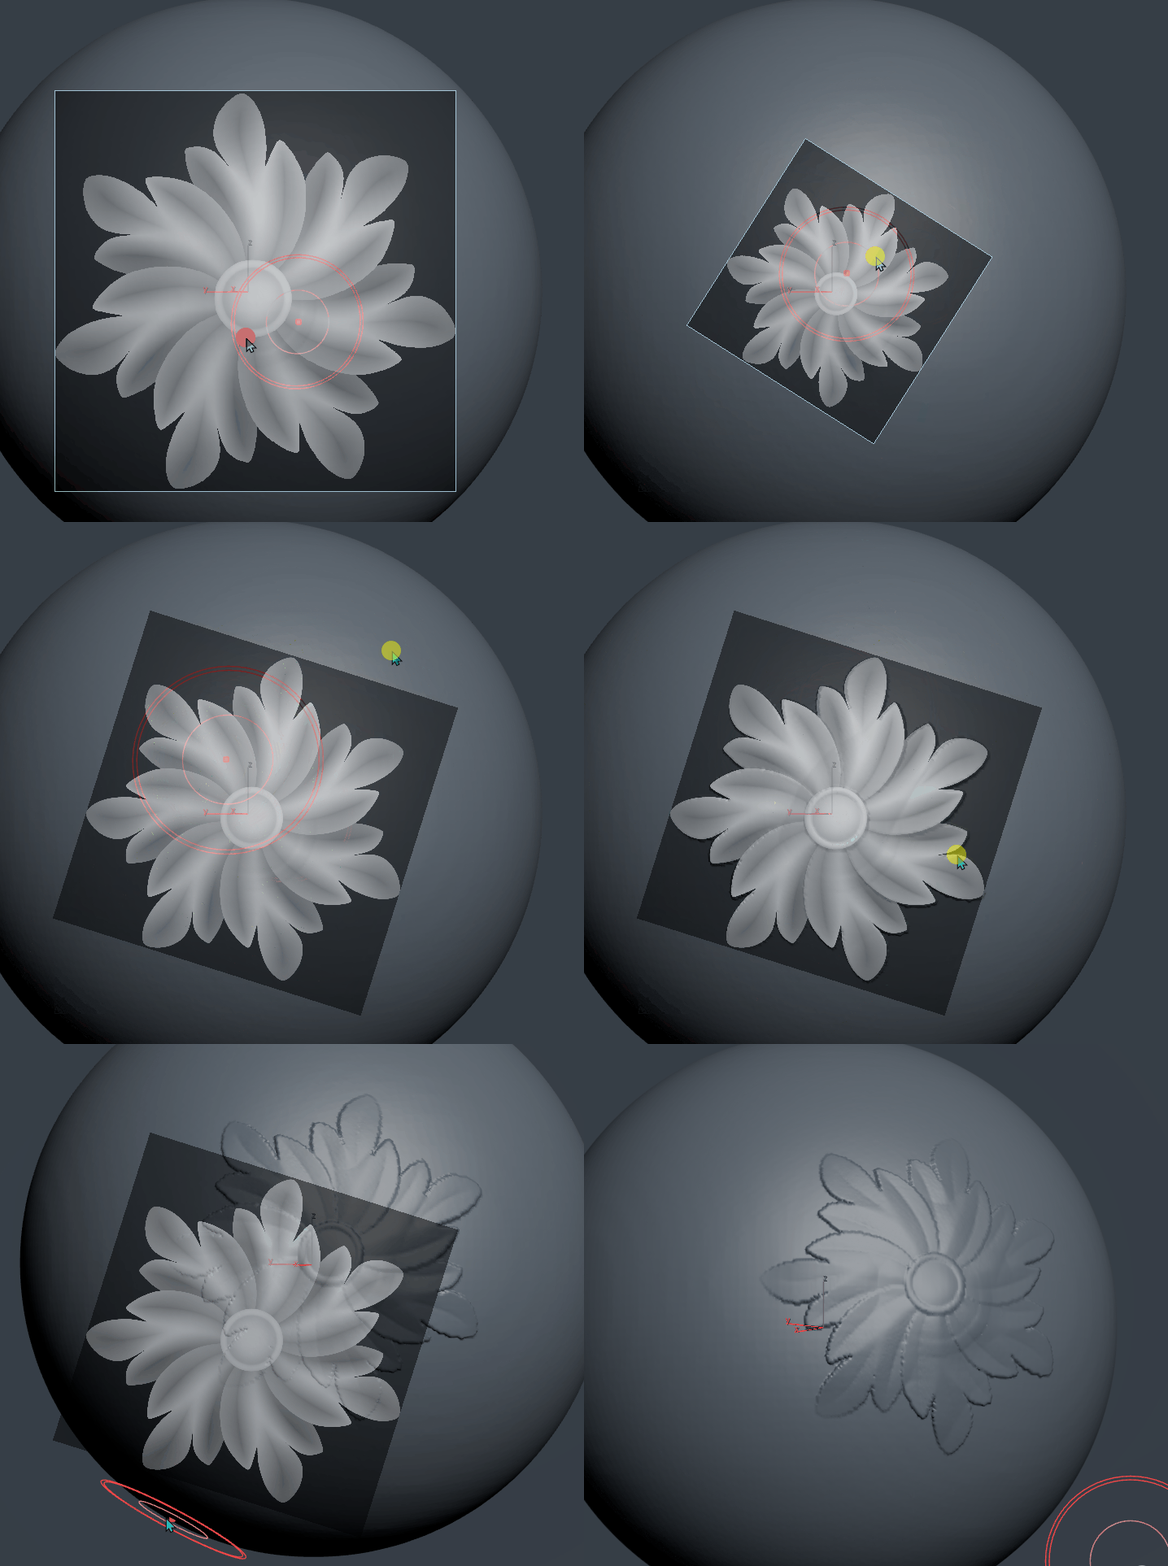
| Stencil reset / refresh | Restores the stencil transform. |
| Delete stencil | Removes the active stencil. |
Stencil images accept common image formats including PNG, JPG, TIFF, BMP, PSD and EXR.
The Mask rollout combines automatic mask generation, cleanup commands, overlay controls and SculptGroup generation. Backface Cull is now in Brush Settings because it affects sculpt, paint and mask brushes.
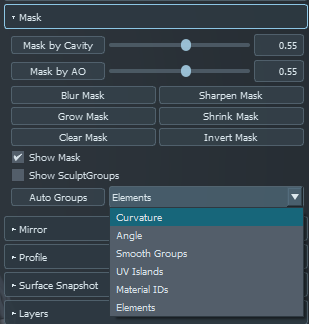
| Control | Purpose |
|---|---|
| Mask by Cavity + Coverage | Builds a mask from cavities and adjusts how broadly the effect spreads. |
| Mask by AO + Coverage | Builds a mask from occluded areas and adjusts its coverage. |
| Blur Mask | Softens mask transitions. |
| Sharpen Mask | Hardens mask transitions. |
| Grow Mask | Expands the masked area. |
| Shrink Mask | Contracts the masked area. |
| Clear Mask | Removes the mask. |
| Invert Mask | Swaps masked and unmasked areas. |
| Show Mask | Shows or hides the mask overlay. |
| Show SculptGroups | Shows or hides SculptGroup coloring. |
| Auto Groups mode | Choose Curvature, Angle, Smooth Groups, UV Islands, Material IDs or Elements. |
| Auto Groups | Builds SculptGroups using the selected mode. |
Mirror can repeat supported sculpt and paint actions across object axes and around a radial arrangement.
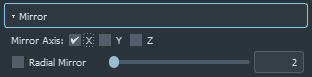
| Control | Purpose |
|---|---|
| Mirror Axis X / Y / Z | Enable one or more axis mirrors. |
| Radial Mirror | Enables radial repetition. |
| Radial count | Sets the number of radial copies from 2 to 32. |
Profile supplies a custom falloff curve for Curve Tube or the active SculptGroup.
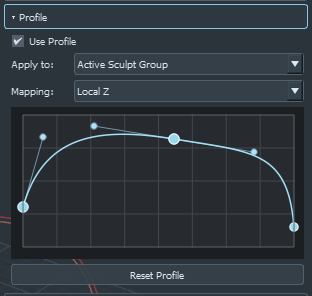
| Control | Purpose |
|---|---|
| Use Profile | Enables profile shaping. |
| Apply to | Choose Curve Tube or Active Sculpt Group. |
| Mapping | Curve Length, Local X, Local Y or Local Z. Curve Tube naturally selects Curve Length; Active Sculpt Group naturally selects Local Z. |
| Reset Profile | Restores the default curve. |
| Input | Action |
|---|---|
| LMB on empty graph | Add a point. |
| LMB drag point or tangent | Move the point or its Bezier handle. |
| Alt + LMB point | Delete an interior point. |
| RMB point | Choose Bezier, Bezier Corner, Smooth or Linear. |
| RMB empty graph | Open Reset View / Reset Profile. |
| Mouse wheel | Zoom. Hold Ctrl or Shift to constrain the zoom to one axis. |
| MMB drag | Pan the graph. |
| MMB double-click | Reset the graph view. |
Capture a reference surface for the Revert brush.
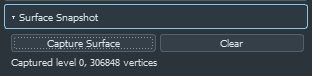
| Control | Purpose |
|---|---|
| Capture Surface | Stores the current surface at the active Multires level. |
| Clear | Removes the captured reference. |
| Status | Shows whether a surface is captured and, when available, the captured level and vertex count. |
The Layers rollout has separate Sculpt and Paint stacks. Clicking either tab also routes Sculpt Mesh into that working mode.
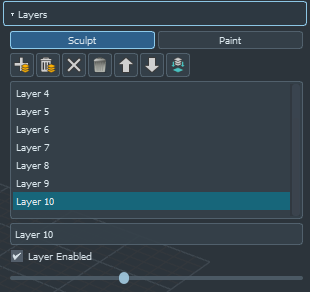
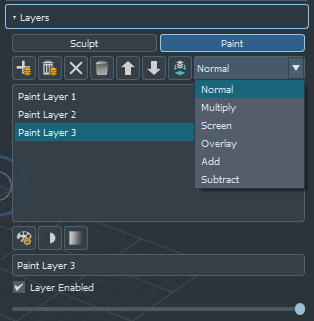
New Layer · Delete Layer · Clear Layer · Clear All Layers · Move Layer Up · Move Layer Down · Bake All
| Stack | Available controls |
|---|---|
| Sculpt | Name, Layer Enabled and Strength. The midpoint of Strength is normal 1× intensity; the right half boosts the layer progressively up to 5×. |
| Paint | Name, Layer Enabled, Opacity and Blend mode: Normal, Multiply, Screen, Overlay, Add or Subtract. |
Paint layers add three live-preview adjustment dialogs with OK and Cancel:
| Control | Purpose |
|---|---|
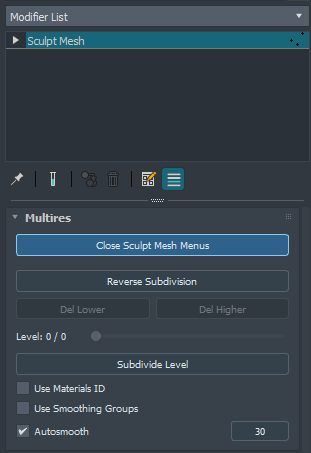
| Open Sculpt Mesh Menus / Close Sculpt Mesh Menus | Opens or closes the floating Sculpt Mesh UI. |
| Reverse Subdivision | Reconstructs one lower quad level per click. |
| Del Lower | Deletes levels below the current one and makes the current level the new base. |
| Del Higher | Deletes all levels above the current one. |
| Level | Moves between the available Multires levels. |
| Subdivide Level | Adds a higher subdivision level. The Multires stack supports levels up to level 6. |
| Use Materials ID | Uses material-ID boundaries when generating a new level where applicable. |
| Use Smoothing Groups | Uses smoothing-group boundaries when generating a new level where applicable. |
| Autosmooth + angle | When enabled, applies Auto Smooth to the evaluated mesh using the angle at the right. When disabled, smoothing groups are removed for a faceted result. The same angle is also used by automatic smoothing after Cutter, Slice and Mesh Library operations. |
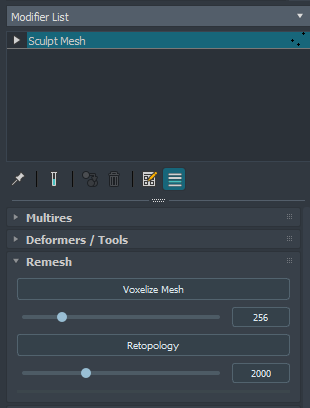
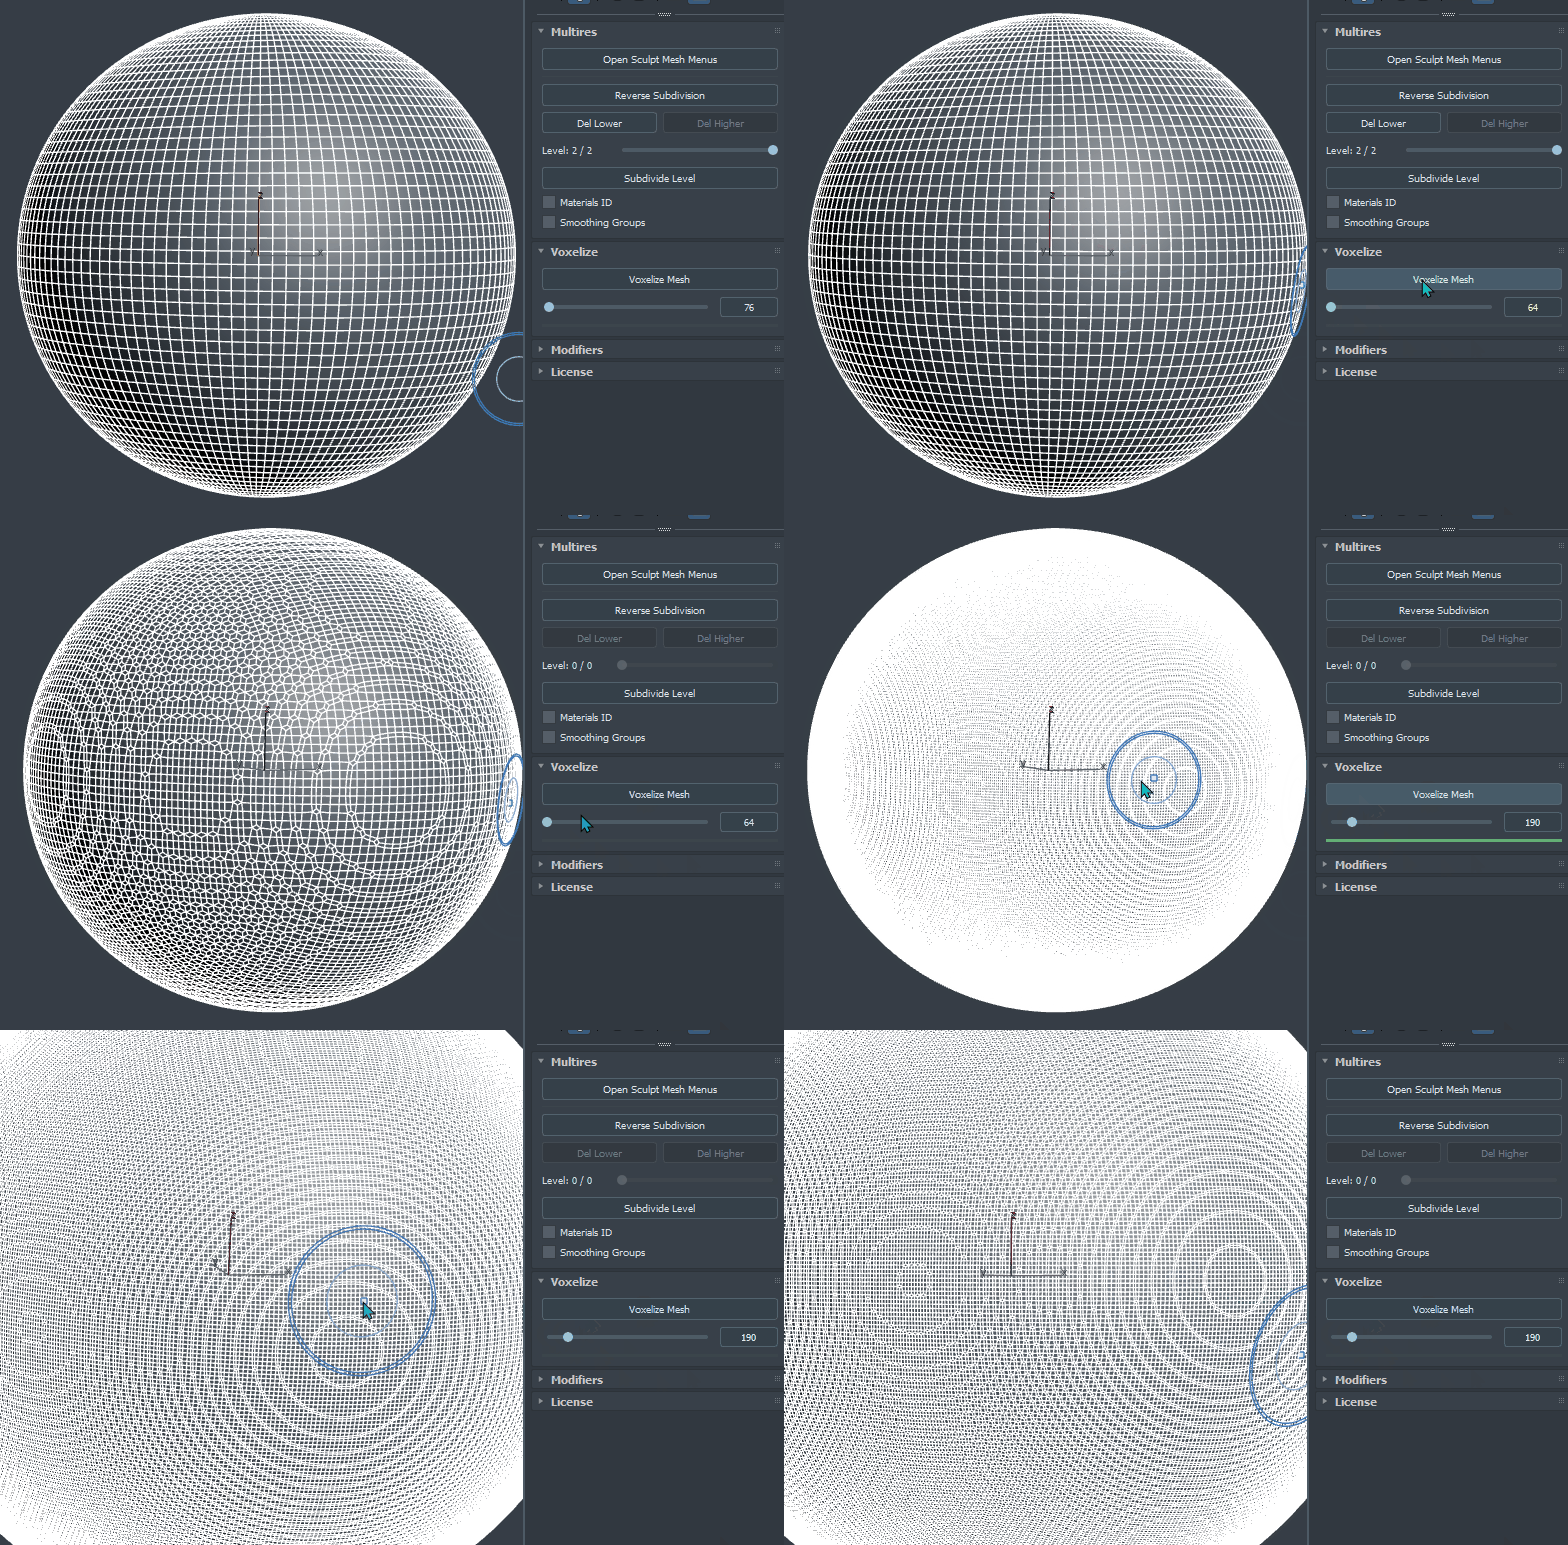
The Remesh rollout contains two topology-rebuild paths: voxel remeshing and quad retopology. Both are geometry-changing operations and replace the working topology.
| Control | Purpose |
|---|---|
| Voxelize Mesh | Rebuilds the current sculpt as a voxelized mesh. |
| Voxel resolution | Sets Voxelize resolution from 64 to 1024. |
| Retopology | Quad-remeshes the current sculpt with the 3ds Max Retopology engine (ReForm) on a hidden temporary copy. The resulting topology replaces the current one; sculpt layers and masks are reset. |
| Ctrl + Retopology | Runs Retopology using the Instant Meshes engine instead of ReForm. |
| Target face count | Sets the quad target from 100 to 1,000,000 faces. The slider is logarithmic; the value box accepts an exact target. |
| Progress | Shared progress indicator for Voxelize and Retopology. |
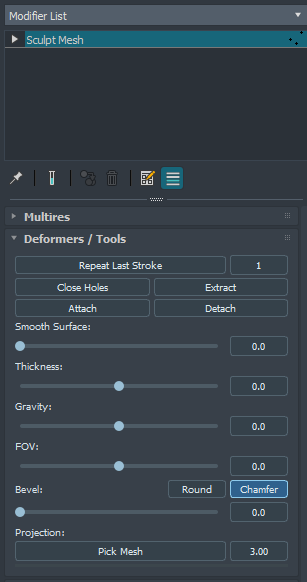
This rollout combines stroke replay, repair/topology tools, mask-based separation, one-shot deformations, bevel and projection.
| Control | What it does |
|---|---|
| Repeat Last Stroke + count | Repeats the deformation from the most recent compatible sculpt stroke on the current Multires level. The soft mask is respected. The count applies the stroke 1–100 times per click and groups the repeats into one undo step. |
| Close Holes | Repairs the current-level mesh by welding coincident vertices, removing degenerate/non-manifold faces, loose debris and isolated vertices, then filling open borders and remeshing the new patches toward the surrounding density. The result becomes Level 0. One undo step. |
| Extract | Copies masked faces to a new, separate Sculpt Mesh while leaving the source unchanged. |
| Attach | Pick another object in a viewport. It is merged into the sculpt with Boolean Union; non-touching geometry is simply combined. The picked object is deleted and the result becomes Level 0. RMB cancels the pick. |
| Detach | Moves masked faces to a new, separate Sculpt Mesh. The source keeps the rest; its sculpt layers, mask and groups are reset after the topology change. |
| Smooth Surface | One-shot whole-surface Relax from 0 to 10. The current soft mask is respected; after processing the control returns to 0. |
| Thickness | One-shot Shell from −50% to +50% of object size. It closes open borders; positive values grow behind the surface and negative values grow in front. The control returns to 0. |
| Gravity | ZBrush-style global gravity deformation. Positive values pull progressively toward world −Z; negative values reverse the direction. The soft mask protects geometry. |
| FOV | Perspective-foreshortening deformation aligned to the active viewport. Positive and negative values reverse the taper direction. The soft mask protects geometry. |
| Bevel + Round / Chamfer | One-shot bevel of hard edges (faces meeting at more than 30°). Width is 0–5% of object size on each face. Round makes a fillet; Chamfer makes a flat profile. It moves existing vertices rather than adding topology, and the soft mask protects geometry. |
| Projection — Pick Mesh | Pick a source mesh and project its detail into the sculpt level by level, from Level 0 to the highest Multires level. Masked areas are protected. RMB cancels the pick. |
| Projection distance | Search distance along the normals, from 0.01% to 100% of sculpt size. Larger values reach farther shapes; smaller values reduce jumps to nearby surfaces. |
The Displace rollout applies an image as non-destructive displacement stored in its own Displace sculpt layer. It is separate from the Displace sculpt brush.
| Control | Purpose |
|---|---|
| Map / … | Loads a displacement image. You can also right-click a custom alpha in the Alphas library and choose Use as Displacement. |
| Mapping | UV Channel 1 or Triplanar. |
| Strength | Displacement height in object units. Negative values push inward. |
| Water Level | Offsets the neutral map value around mid gray: the map value that stays on the surface is 0.5 + Water Level. |
| Blur (px) | Blurs the source map in map pixels before displacement. |
| Contrast | Contrast around mid gray; 1 leaves contrast unchanged. |
| Tile U / Tile V | Repeats the map along U and V. |
| Offset U / Offset V | Shifts the map along U and V. |
| Live Update | After the first Apply has created the Displace layer, changing a setting automatically recomputes it after a short debounce. |
| Apply | Writes displacement into the Displace layer on the highest Multires level. Re-applying replaces that layer result; it does not accumulate repeated displacement. |
| Remove | Deletes the Displace layer. |
Supported map choices include PNG, JPG/JPEG, TIF/TIFF, BMP, TGA, EXR and PSD.
Bake Maps treats Level 0 as the low-poly mesh and the highest Multires level as the high-poly source. Baking uses UV channel 1.
| Control | Purpose |
|---|---|
| Auto Unwrap | Creates UV channel 1 on Level 0 without adding an Unwrap UVW modifier. It uses hard-edge/smoothing boundaries as seams, adds cuts where shells cannot flatten cleanly, and packs the resulting islands into 0–1. The Multires stack and baker use these UVs. One undo step. |
| Output (base name) | Base file name for all baked maps. The typed extension is ignored; maps are written next to it with map-type suffixes. |
| Size | 512, 1024, 2048, 4096 or 8192 pixels. |
| Format | PNG, TGA, JPG or BMP for Normal, Curvature and AO. These are 8-bit RGB outputs. Displacement is always 32-bit float EXR. |
| Tangent basis | Level 0 targets the low-poly mesh as-is. Subdivided targets Level 0 when it will be subdivided at render time. |
| Normal Map | Tangent-space normal map using green −Y, matching DirectX / 3ds Max convention. |
| Displacement (EXR 32-bit) | Scalar displacement in object units relative to Level 0 subdivided to the highest level. The neutral mid level is 0. |
| Curvature + Contrast | Bakes curvature; Contrast 1 is the default response. |
| Ambient Occlusion | Bakes AO. Distance % limits the search as a percentage of object size; Rays sets samples per high-level vertex from 4 to 512. |
| Padding (px) | Expands pixels around UV-island edges from 0 to 128 px. |
| Bake Maps | Runs the selected maps and shows progress. The result dialog includes Open Folder. |
<name>_normal, <name>_curvature and <name>_ao in the selected image format, plus <name>_displacement.exr when displacement is enabled.The Sculpting palette contains the brushes below. Alt commonly reverses the main effect where listed. Shift is temporary Smooth for ordinary sculpt brushes, but some specialized tools use Shift for their own gesture.
| Brush | Use and special interaction |
|---|---|
| Sculpt | General-purpose height and volume sculpting. Alt reverses the direction. Supports Layer Mode. |
| Clay | Builds broad clay-like volume against a local working plane. Alt reverses the build direction. |
| Clay Buildup | Builds stronger, more defined clay strokes. Alt reverses the effect. |
| Carve | Cuts a groove into the surface; Alt raises instead. |
| Knife | Sharp fracture/chip brush for hard cuts. Normal strokes cut inward; Alt raises outward. |
| Contrast | Pushes local surface contrast and detail; Alt reverses the operation. |
| Scrape | Shaves high points toward a plane. Alt fills lower areas. Brush Settings adds Original Plane and Original Normal options. |
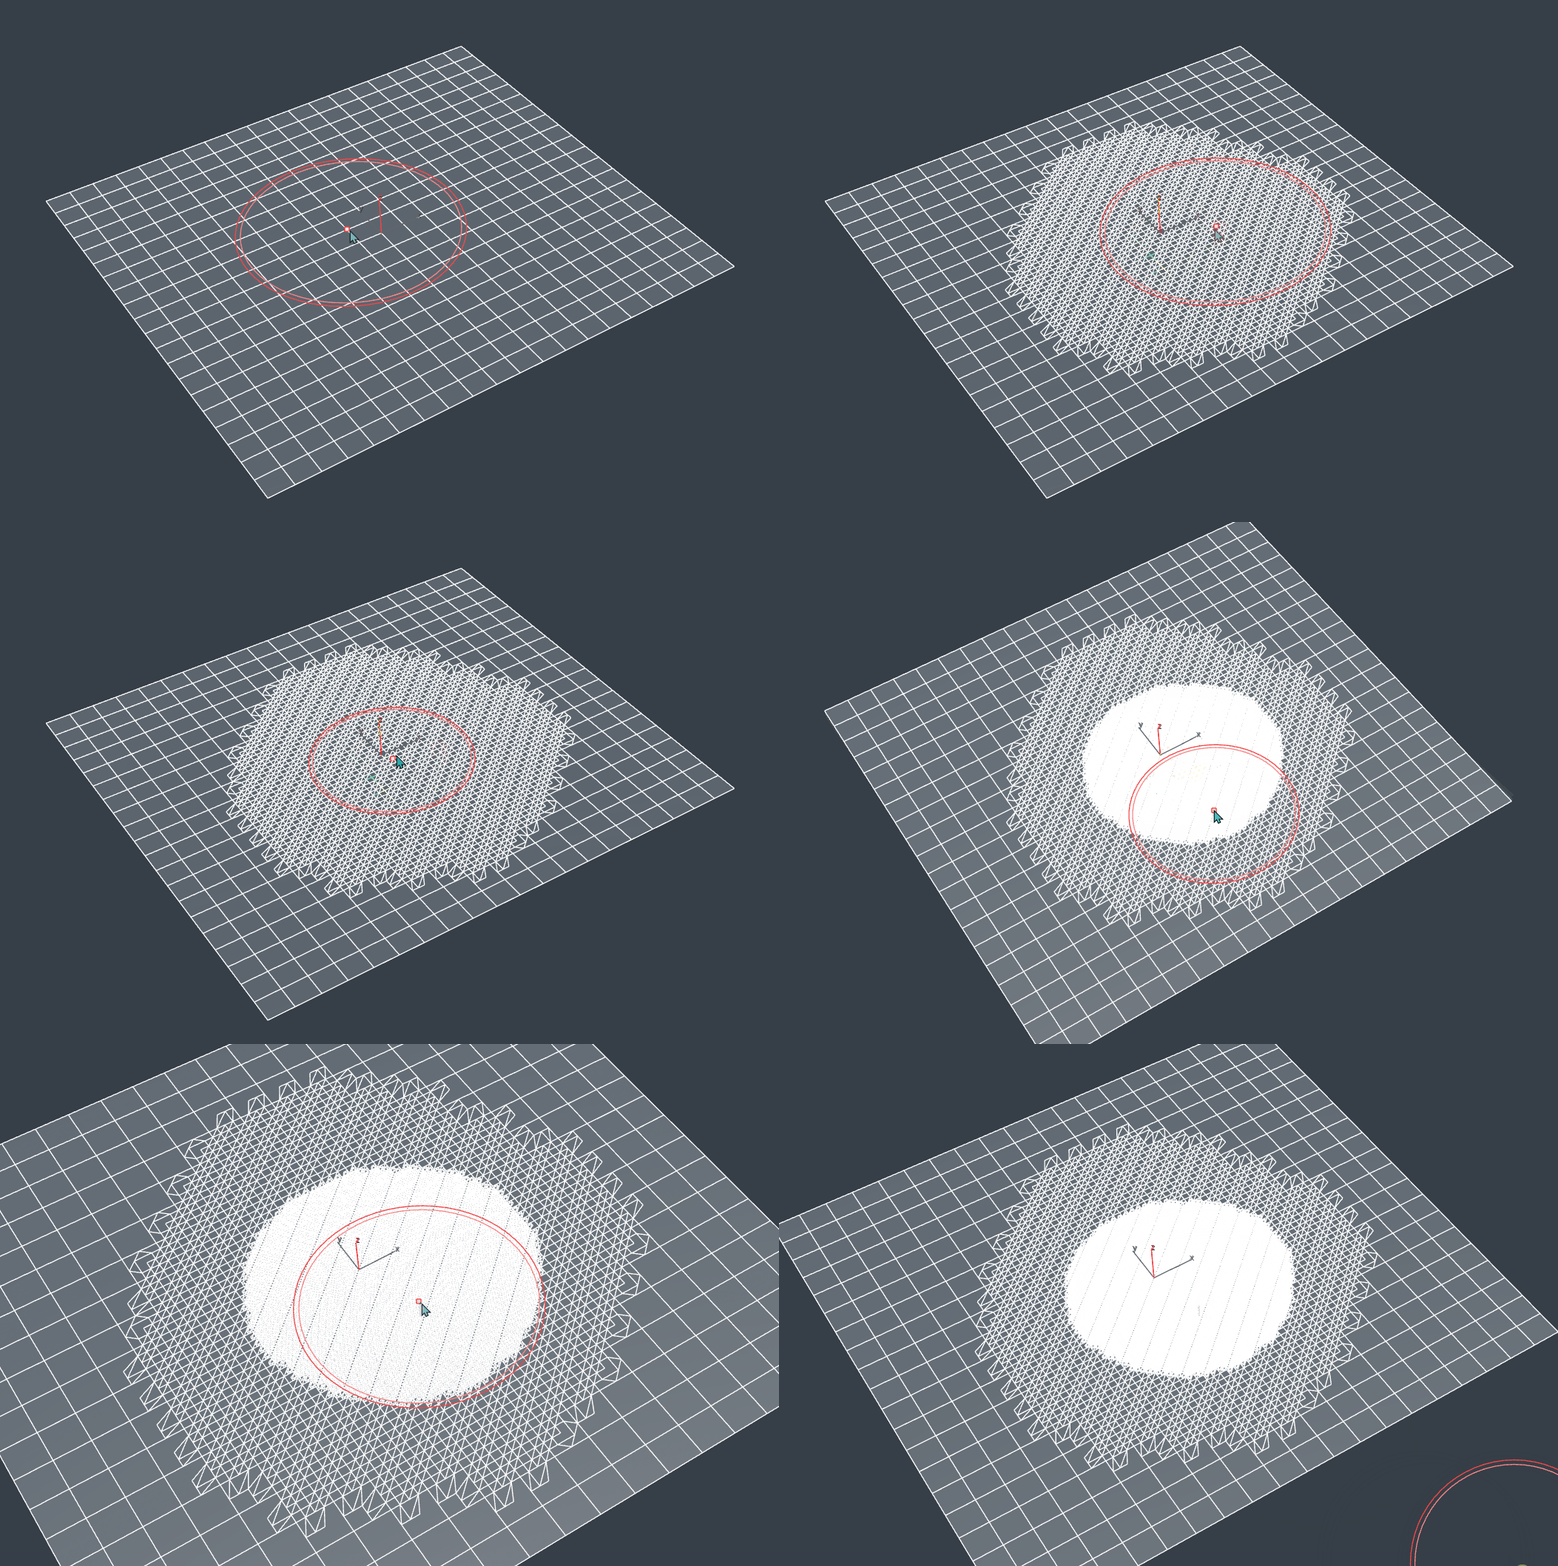
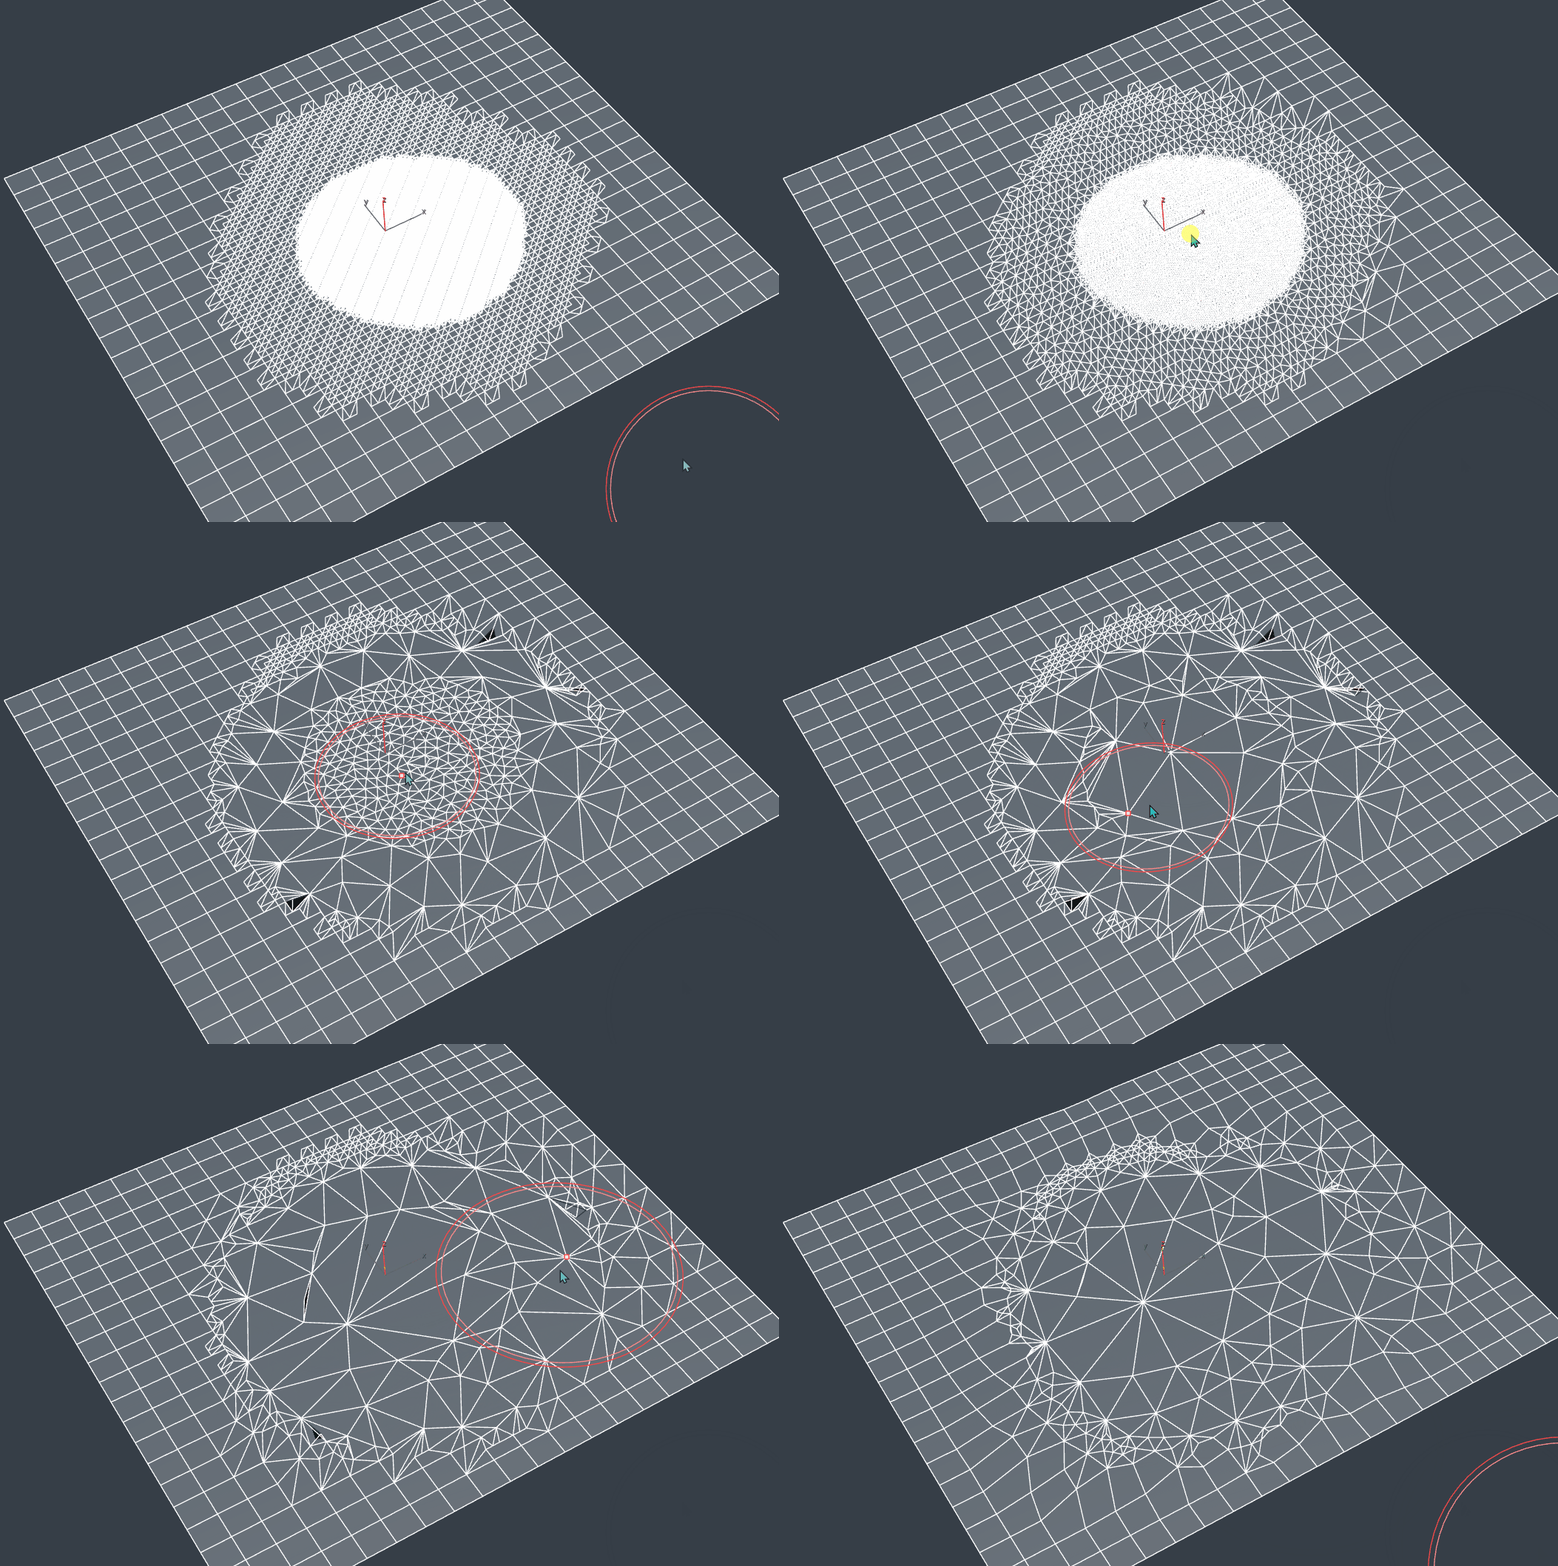
| Density | Adds local mesh density while sculpting; Alt reduces it. The mesh structure updates when the stroke ends, so treat this as a geometry-changing operation. |
| Revert | Moves the brushed area toward the captured Surface Snapshot at the current Multires level. |
| Face groups | Normal stroke creates a new SculptGroup. Shift reuses/extends the group under the first dab. Alt returns faces to SculptGroup 0. |
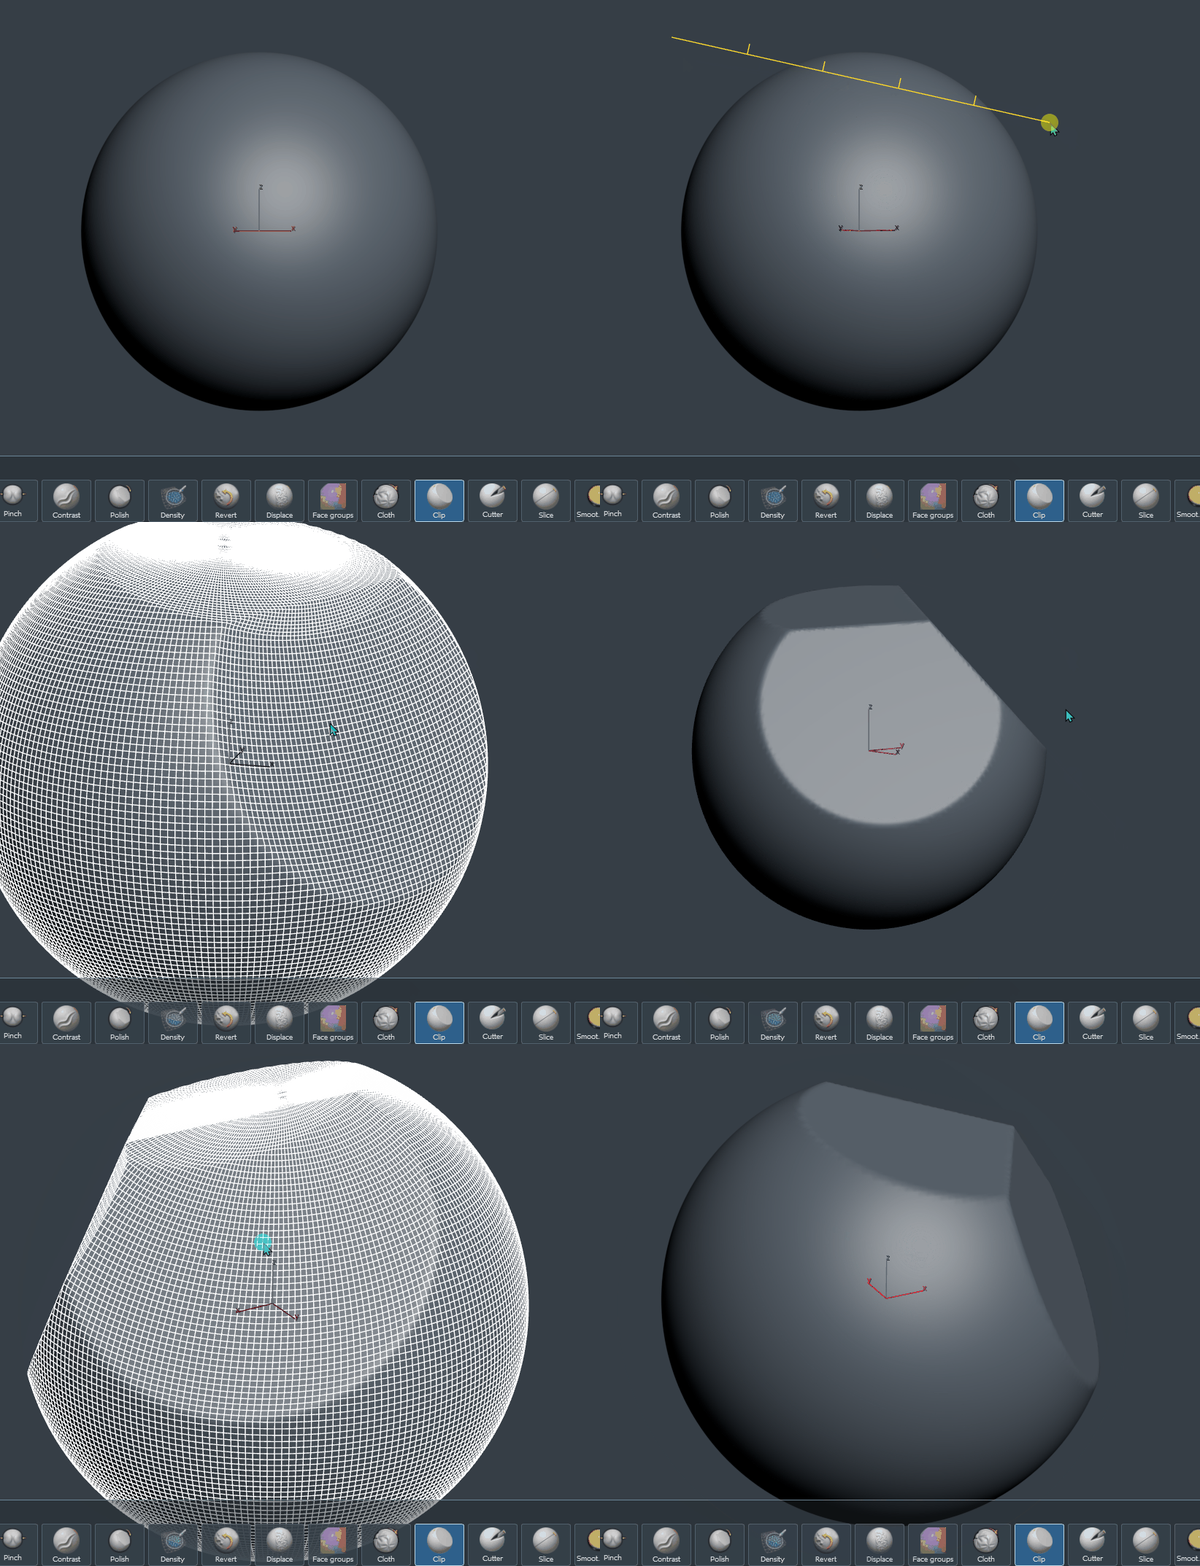
| Clip | Screen-space clip/flatten gesture. Drag for a line; Alt+drag for a free curve; Ctrl+drag for a rectangle; Shift+drag for a circle. With rectangle/circle, add Alt to invert the affected side. Hold Space during the gesture to pan the preview. |
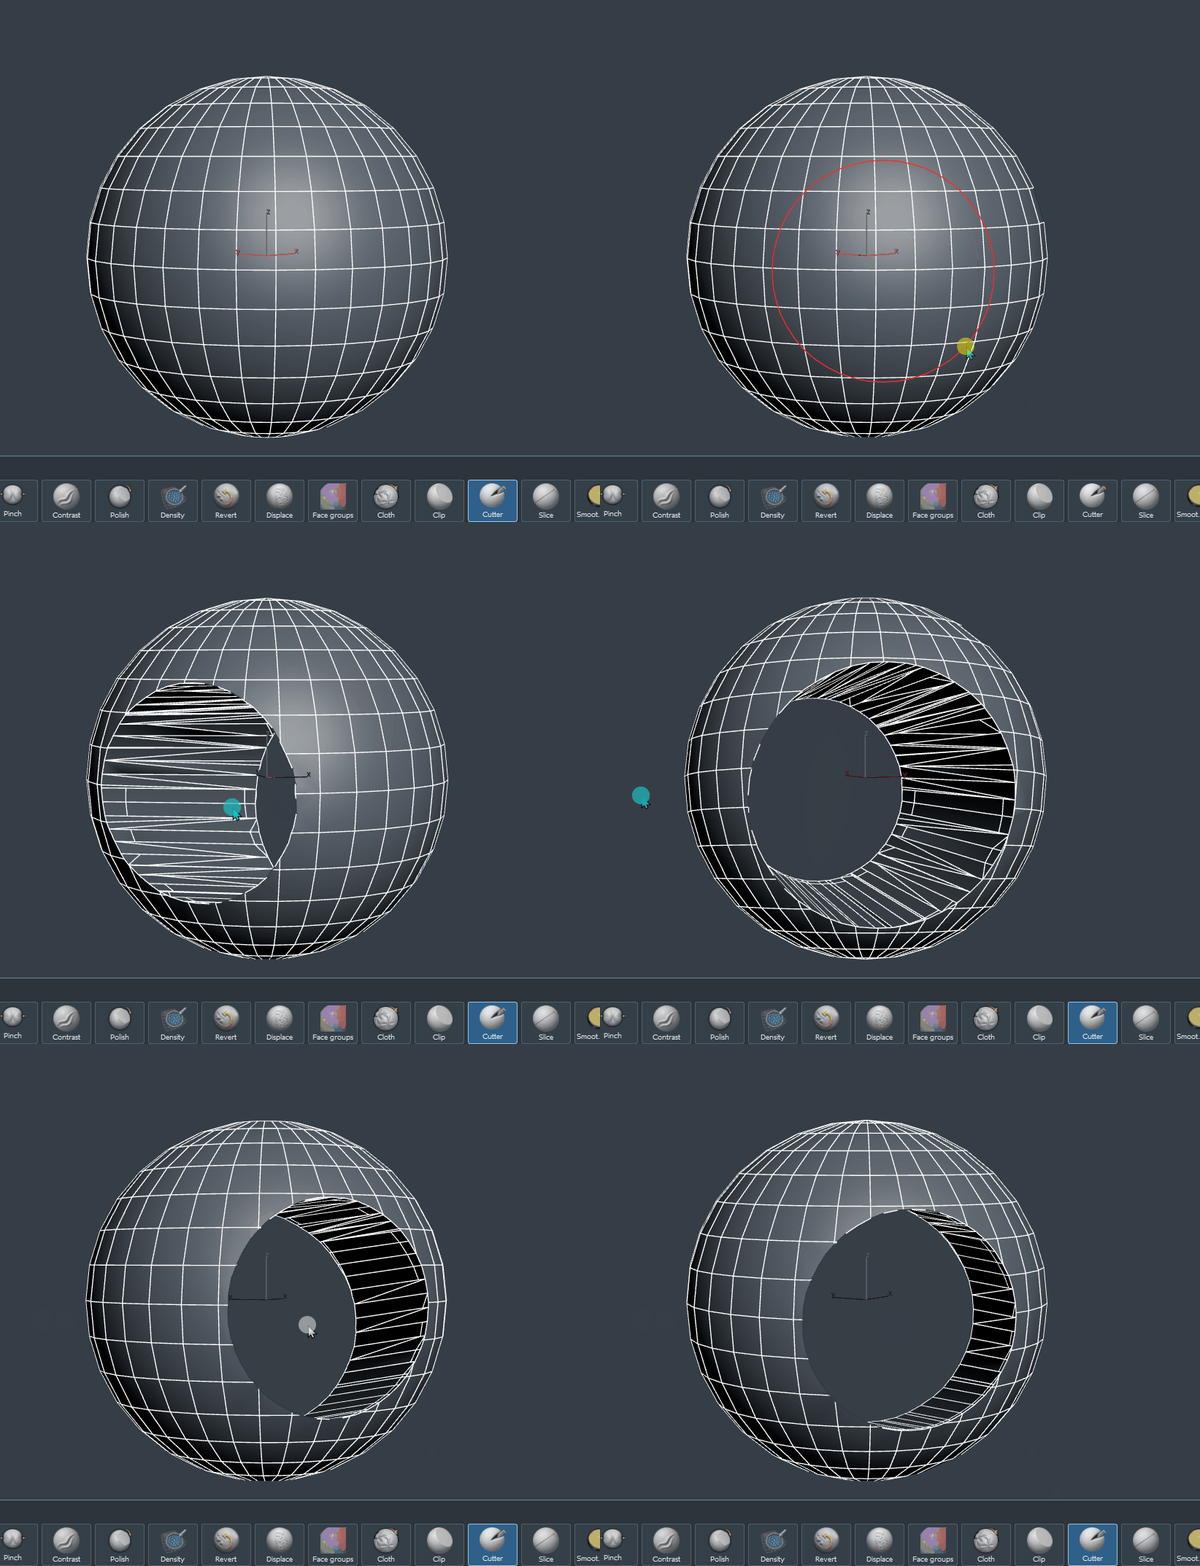
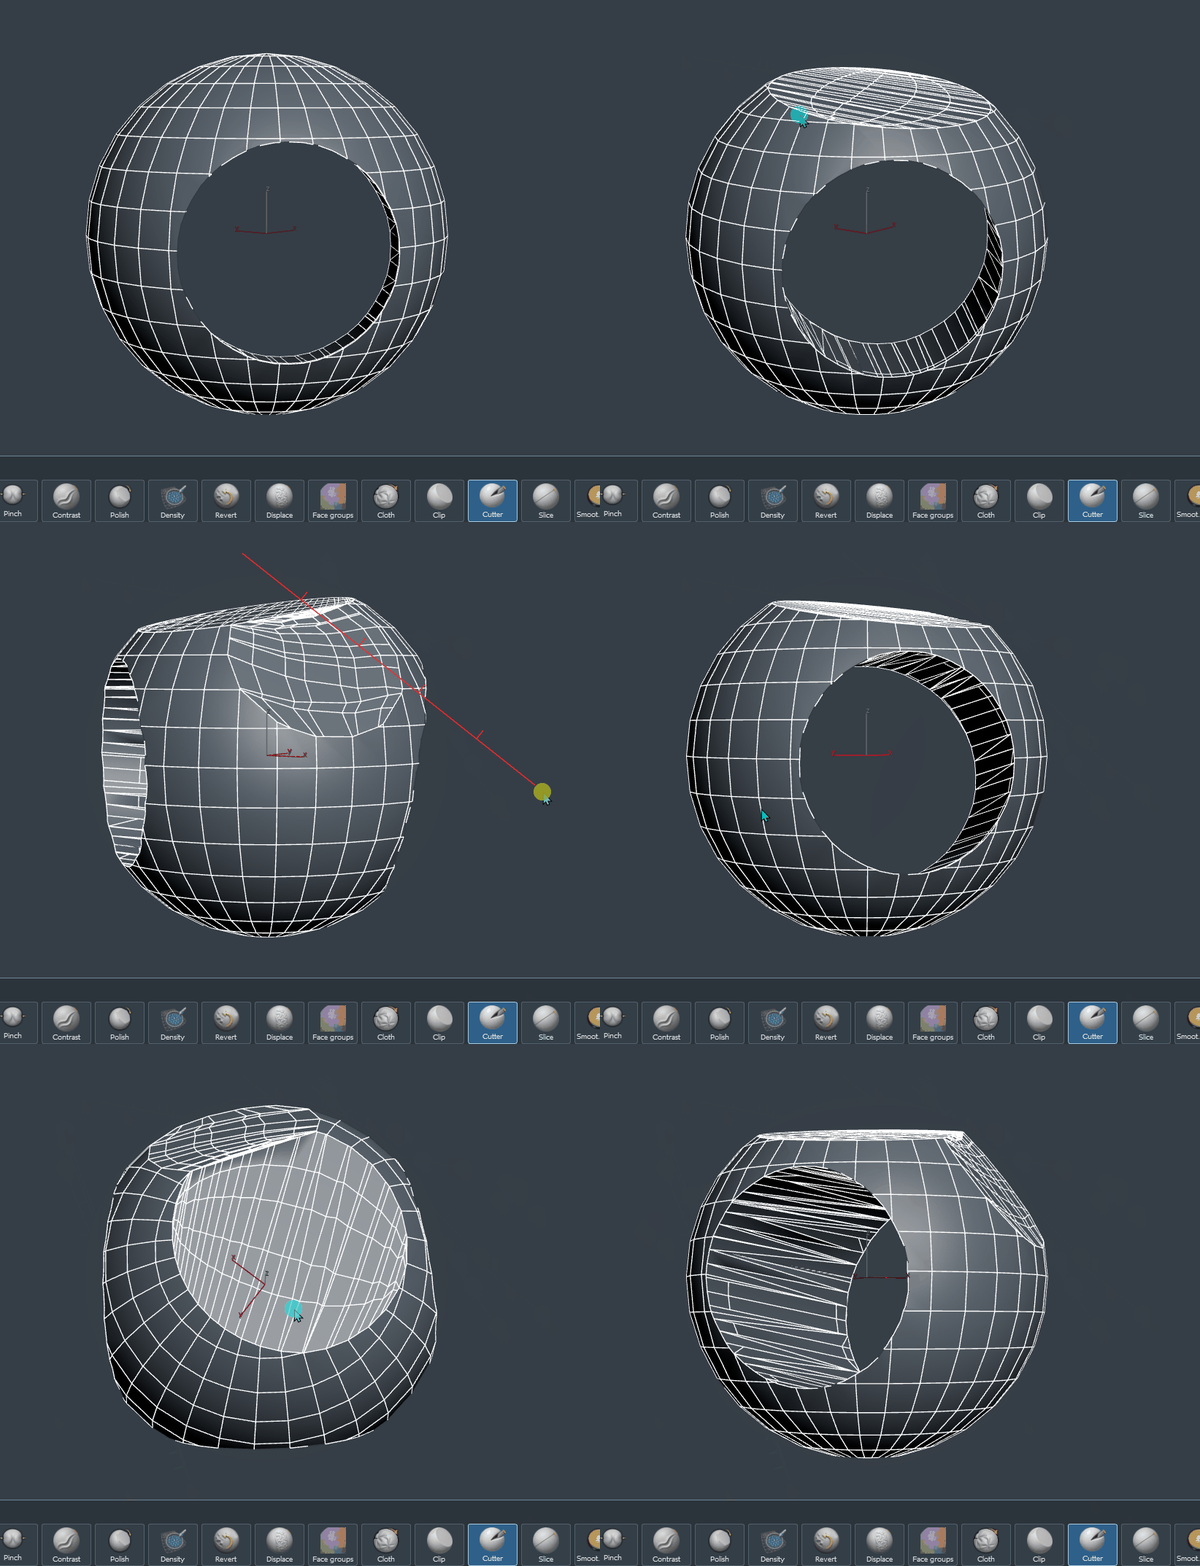
| Cutter | Removes geometry using a screen-space cut region. Drag for a line; Ctrl+drag for a rectangle; Shift+drag for a circle; Alt reverses the removed side. Hold Space to pan the preview. |
| Slice | Cuts through the surface along a straight screen-space line and separates the result into two parts. Hold Space to pan the preview before release. |
| Snake Hook | Pulls a region outward along the drag path for long hook-like forms. |
| Cloth | Deforms the surface with cloth behavior driven by the Cloth settings. Alt applies the shrink-style secondary action; Shift temporarily Smooths. |
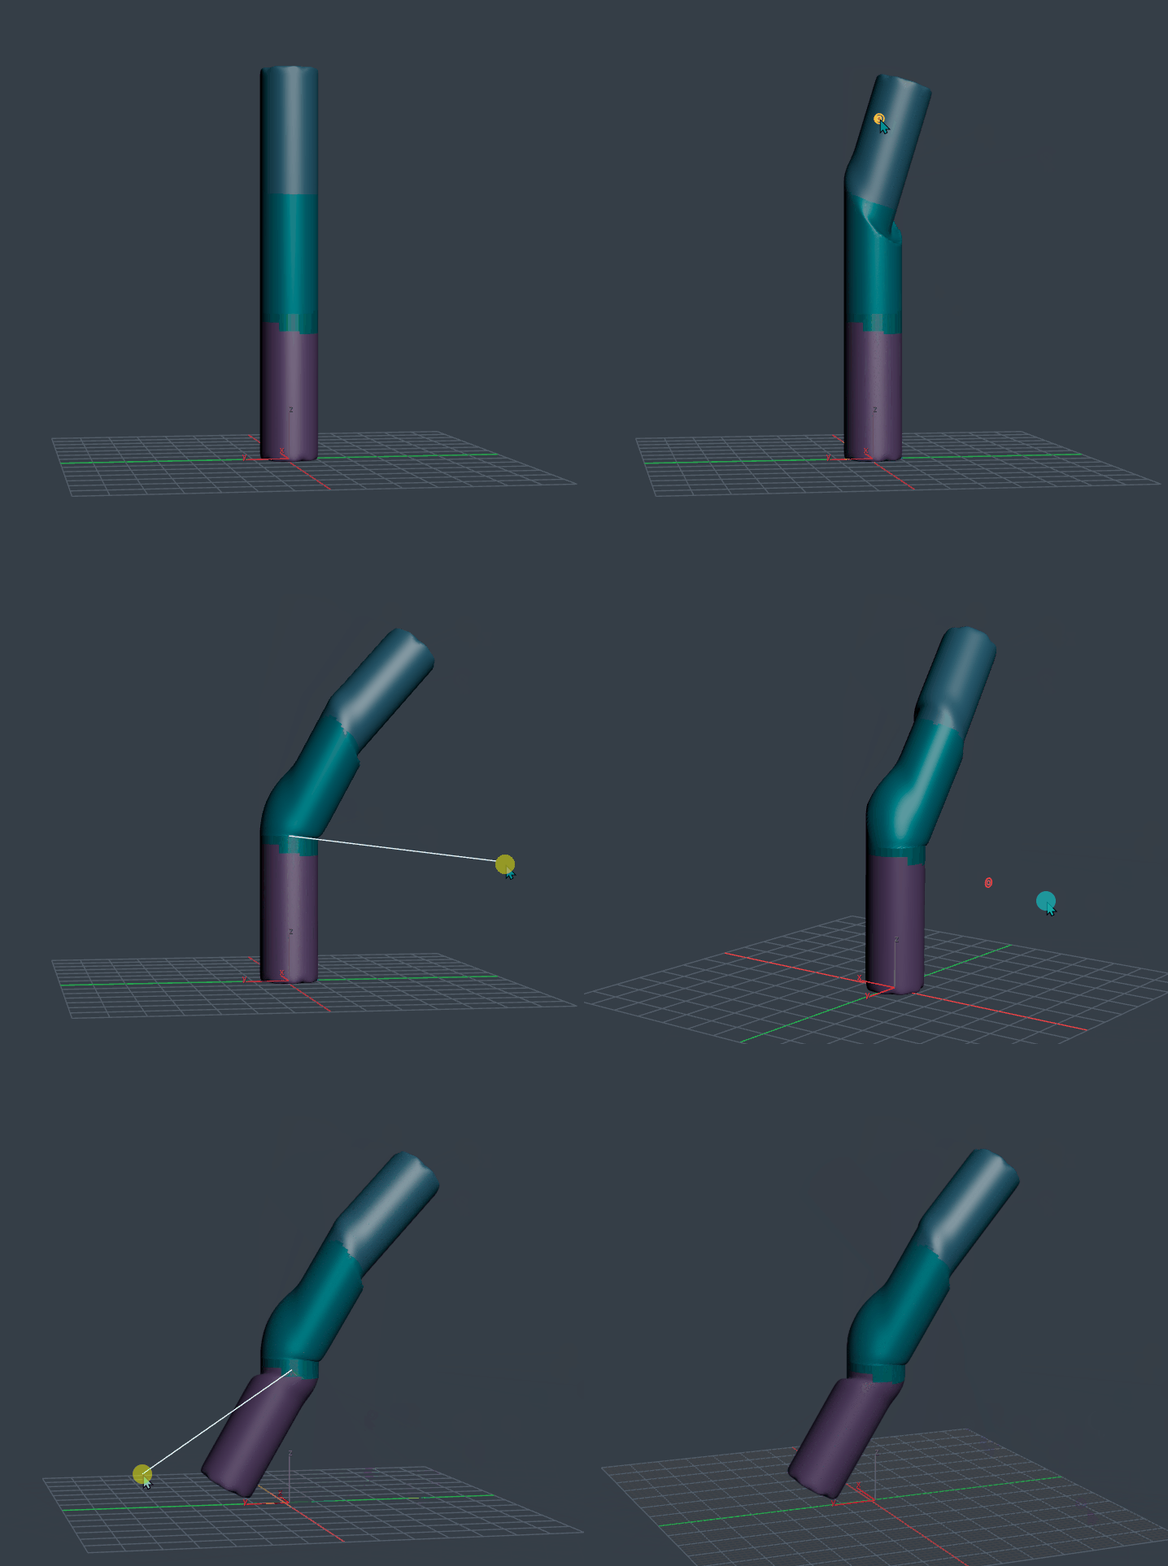
| Pose | First drag defines pivot A and handle B. Later drags rotate around A while B follows the new handle position. RMB clears the hinge guides. Pose behavior is further controlled by the Pose settings. |
| Curve Tube | LMB creates or edits a live tube. Ctrl+LMB starts on a camera-facing plane through the first surface hit. Shift+LMB relaxes control points. Ctrl+Alt+LMB drag near a tube end tapers that end. RMB commits; Esc cancels the live preview. |
| Move | Grabs and moves a surface region. The drag can continue away from the surface, and Move can also start with the brush center beside the mesh as long as geometry falls inside the brush radius. AccuCurve is available in Brush Settings. |
| Polish | Polishes toward a cleaner plane. Alt fills low areas. Polish Hardness is available in Brush Settings. |
| Pinch | Pulls points toward the brush center. Alt spreads them away. |
| Inflate | Expands the surface along its normal direction. Alt dents inward. |
| Displace | Uses the active Stencil as height over existing surface detail. Height Mid sets neutral height; Displace Fade controls the edge transition; Alt reverses. Supports Layer Mode. |
| Smooth | Relaxes and smooths the brushed surface. |
| Smooth SG Border | Smooths only borders between SculptGroups. |
Paint tools are the six items in the Paint palette. They are separate from Stroke Modes.
| Tool | Behavior |
|---|---|
| Paint | Paints Color A into the active Paint layer. Alt temporarily erases where supported. |
| Smudge | Smears existing color along the stroke direction. |
| Fill | Fills the active Paint layer with the current Color A. |
| Blur | Blurs the active Paint layer under the brush. Brush Settings exposes Blur Strength. |
| Erase | Erases the active Paint layer toward transparency. |
| Gradient | Drag across the surface to create a Color A → Color B gradient. |
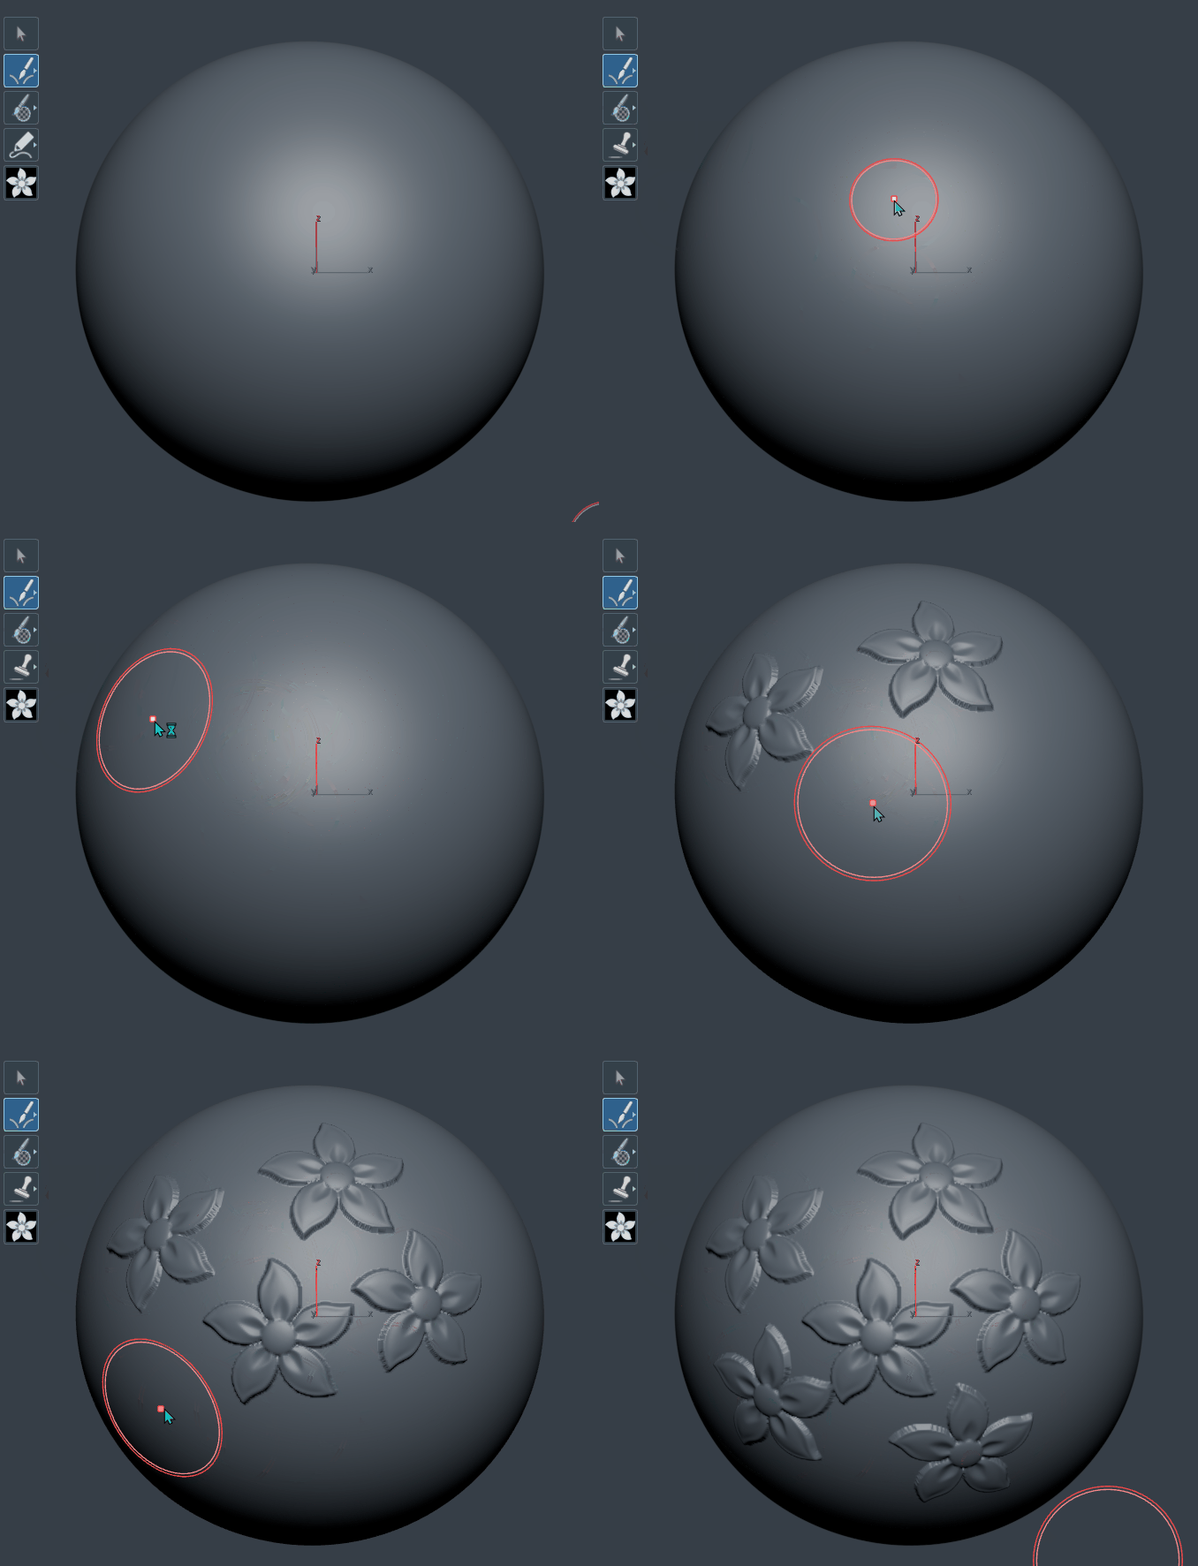
Stroke Modes change how the current Sculpt brush or Paint tool places its effect. They are selected from the fourth slot of the left toolbar.

| Mode | Behavior |
|---|---|
| Draw | Standard freehand stroke. |
| Stamp | Places one dab per click at the cursor. |
| Drag | Click-drag to place and size the brush/alpha in screen space before applying it. |
| Color Mix | Paint-only mode that mixes between Color A and Color B. Selecting it switches to Paint. |
| Scatter | Places scattered dabs around the stroke. Works in Sculpt and Paint and reveals Scatter controls in Brush Settings. |
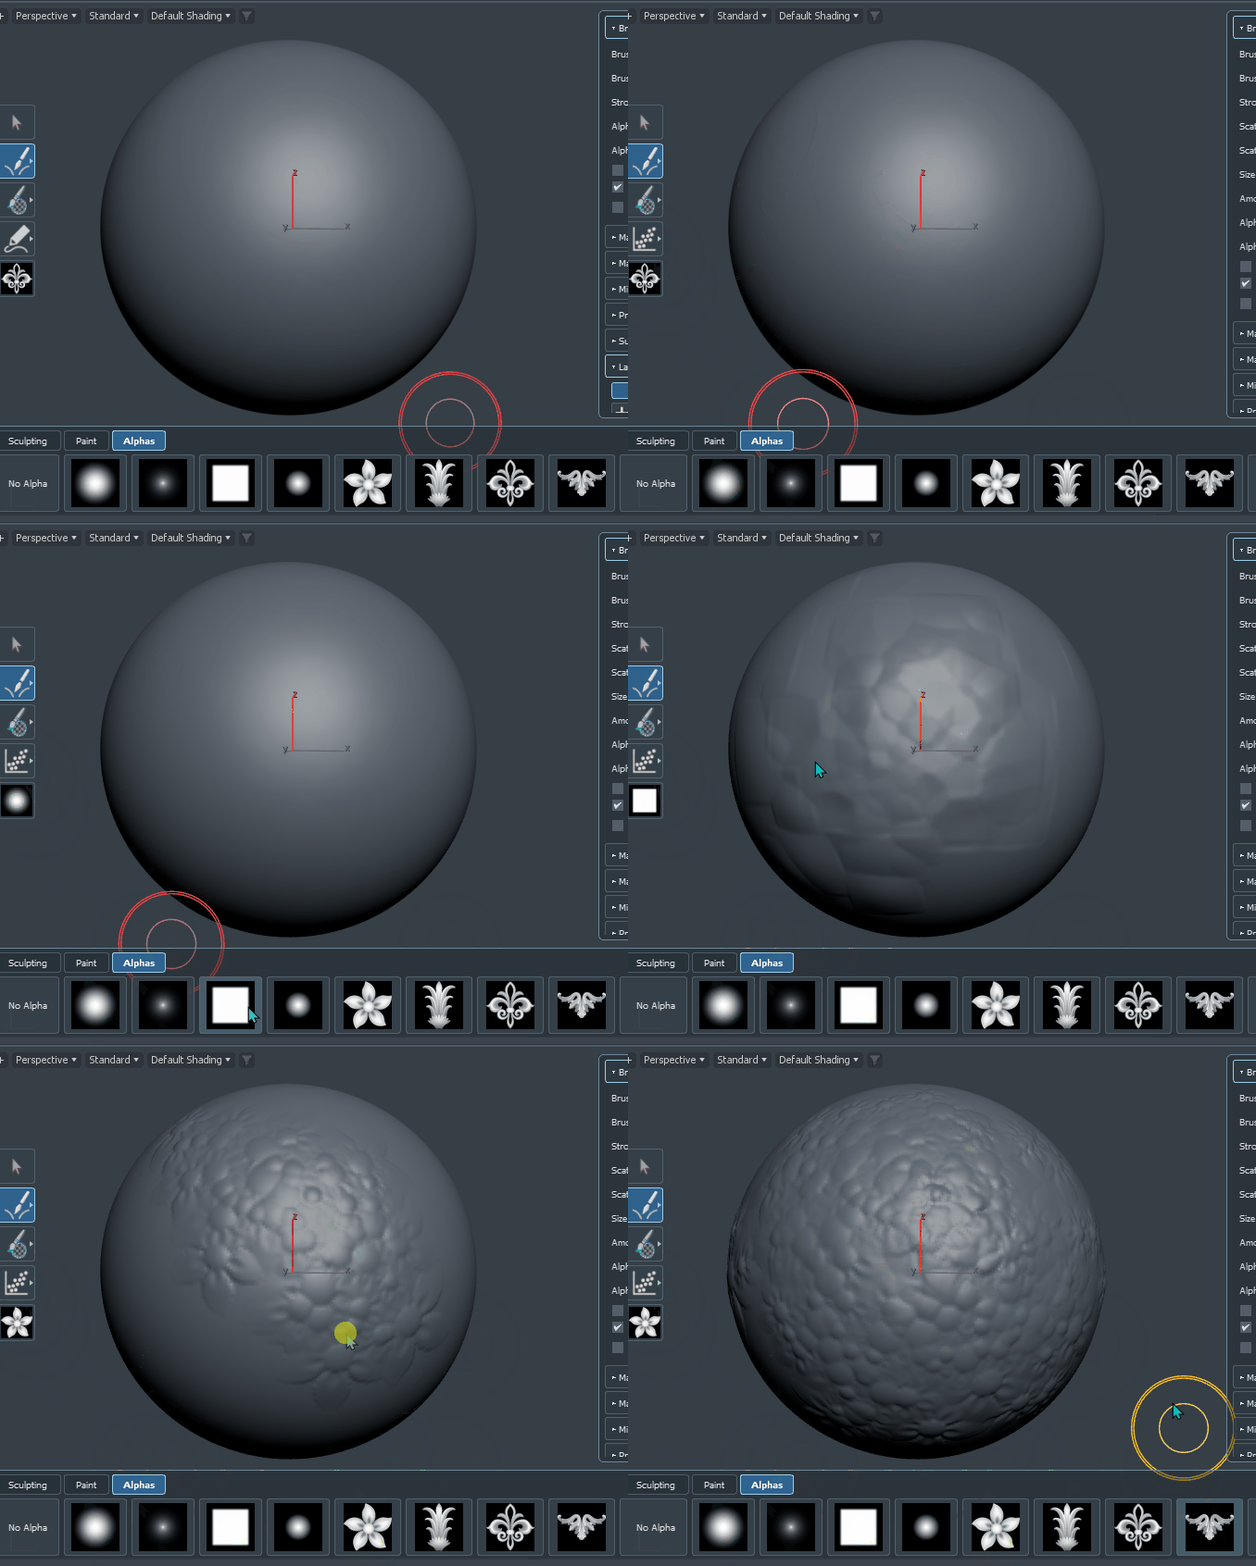
Use the Alphas page to switch between no alpha, built-in shapes and a categorized custom alpha library.
Custom alpha images accept PNG, JPG/JPEG, TIF/TIFF, BMP, TGA, PSD and EXR.
The Meshes palette page is a kitbash library for reusable surface-stamped assets. Assets can be stored as MAX, FBX or OBJ files and are shown with a same-name JPG thumbnail when available.
| Control / input | Behavior |
|---|---|
| Library Folder | Chooses the Mesh Library root. Its sub-folders become categories. |
| Category / Favorites | Browses one sub-folder or the Favorites list. |
| Add Selected | Saves the selected scene object(s) into the active category as .max assets plus generated .jpg thumbnails. If the selected object is the Sculpt Mesh, the current sculpted mesh is saved. When Favorites is active, the asset is saved in the library root and added to Favorites. |
| Click asset thumbnail | Arms that asset for viewport placement. A temporary x-ray preview follows the sculpt surface and aligns its local Z axis to the surface normal. |
| LMB drag, release | Places the asset on the surface and performs Subtract. |
| Alt on release | Performs Union instead of Subtract. |
| Ctrl on release | Skips the Boolean and inserts the posed asset as a separate Sculpt Mesh object. |
| Hold Shift and move | Locks position; left/right rotates around the surface normal and up/down scales the asset. |
| RMB | Cancels placement and switches to the Select tool. |
| Esc | Cancels placement while leaving sculpt mode active. |
| Right-click asset | Add/Remove Favorite, Generate/Regenerate Thumbnail, Show in Explorer, or Delete. Delete moves the asset and its companion files to the Windows Recycle Bin. |
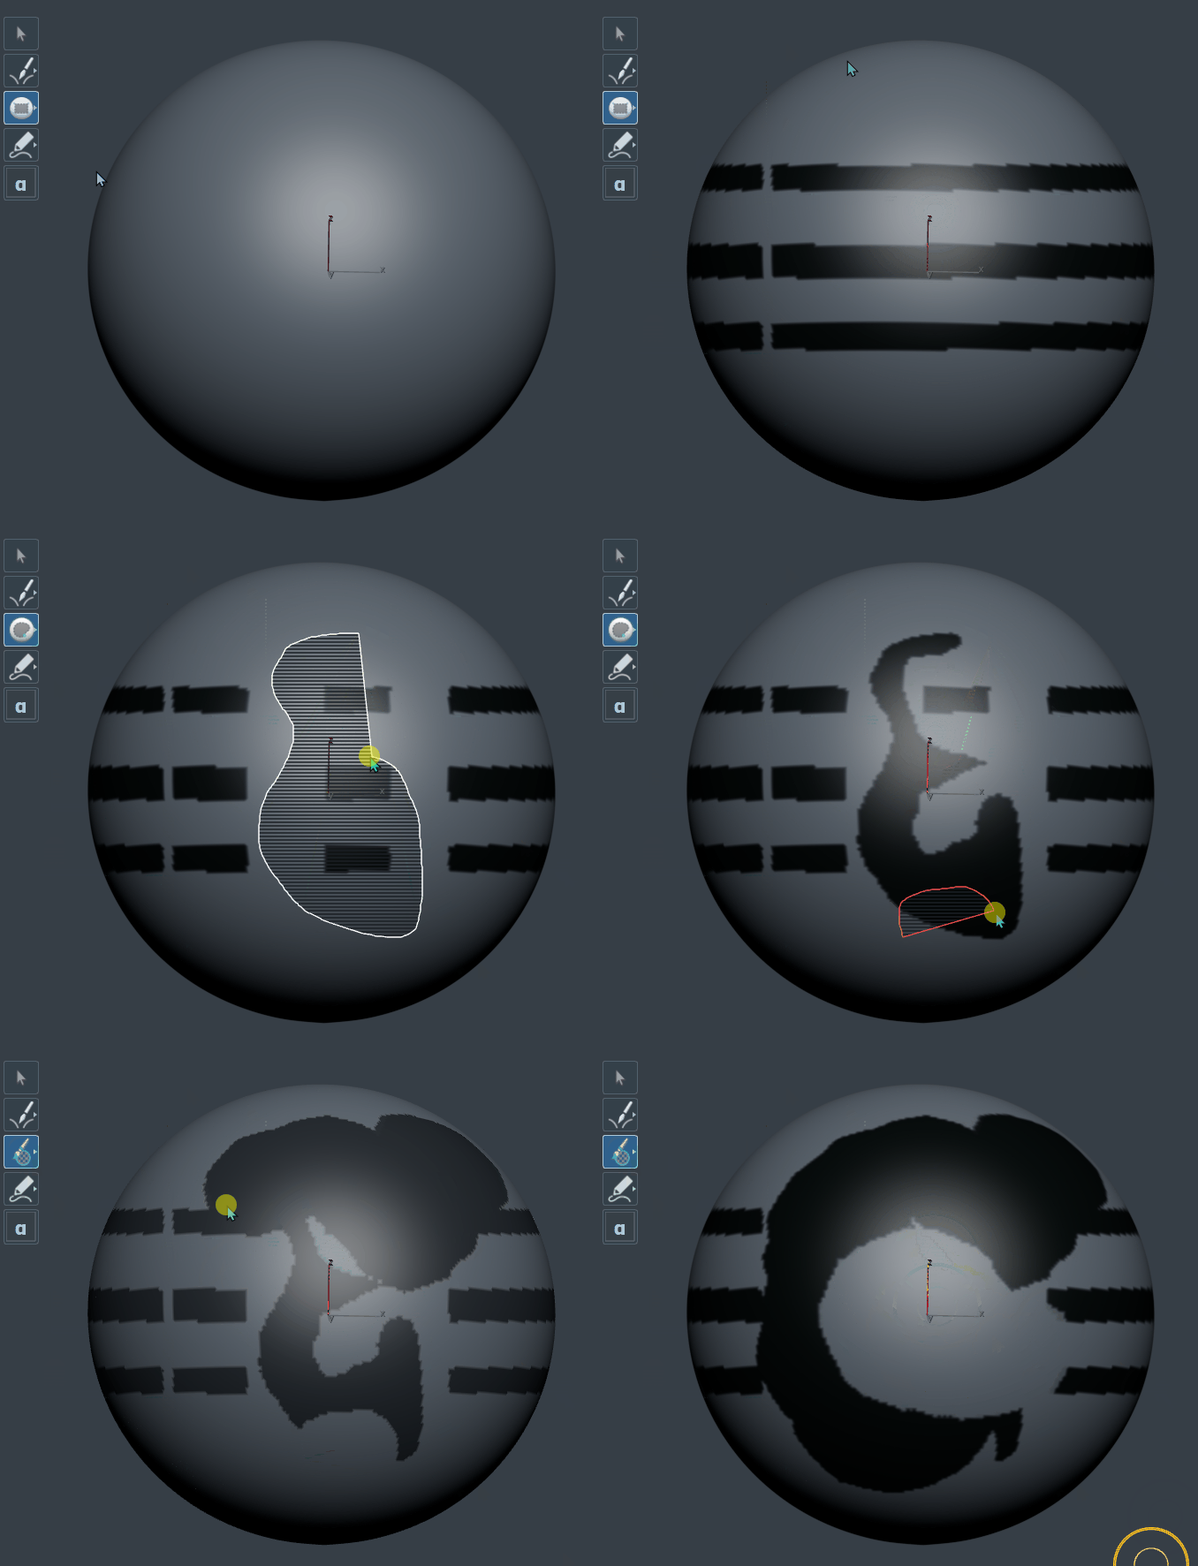
The Mask flyout contains Paint Mask, Rectangle and Lasso. While Sculpt or Paint remains selected, hold Ctrl to temporarily use the last selected Mask tool.
| Input | Action |
|---|---|
| Paint Mask + LMB drag | Paint mask directly. |
| Paint Mask + Alt + LMB | Erase / unmask. |
| Paint Mask + LMB double-click on mesh | Blur the mask locally. |
| Sculpt/Paint + Ctrl + LMB stationary click on mesh | One local Blur Mask pass using temporary Paint Mask. |
| Sculpt/Paint + Ctrl + LMB drag on mesh | Paint the last selected Mask tool temporarily. |
| Sculpt/Paint + Ctrl + Alt + LMB | Erase / unmask with the temporary Mask tool. |
| Rectangle / Lasso | Screen-space mask selection. Drag a shape over the mesh; Alt erases instead of adding. |
| Context | Input | Action |
|---|---|---|
| Paint Mask selected directly | LMB click empty space | Toggle mask on visible geometry: if a visible mask exists it is cleared; otherwise all visible geometry is masked. |
| Paint Mask selected directly | Alt + LMB click empty space | Clear mask from visible geometry. |
| Paint Mask selected directly | LMB drag in empty space | Invert the mask on visible geometry. |
| Sculpt/Paint persistent | Ctrl + LMB click empty space | Same visible-mask toggle. |
| Sculpt/Paint persistent | Ctrl + Alt + LMB click empty space | Clear visible mask. |
| Sculpt/Paint persistent | Ctrl + LMB drag in empty space | Invert visible mask. |
Rectangle or Lasso started in empty space behave normally if the finished shape crosses the mesh. If the shape touches nothing, the matching visible-mask shortcut is used.
| Input | Action |
|---|---|
| Ctrl + Shift + Alt + LMB click a group | Cycles the clicked group through isolate/hide visibility behavior. |
| Same chord + click empty space | Show all groups. |
| Same chord + drag in empty space | Invert visible and hidden groups. |
| Ctrl + W | Create a SculptGroup from the current mask. |
The Quick Menu opens near the cursor for fast brush and paint changes.
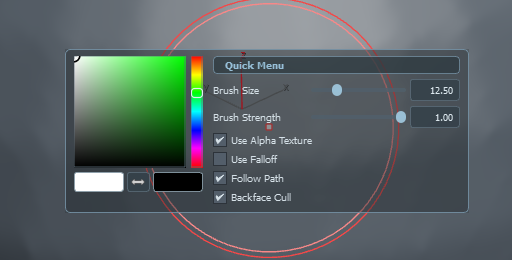
It contains a paint color palette, Color A, Swap A/B, Color B, Brush Size, Brush Strength, Use Alpha Texture, Use Falloff, Follow Path and Backface Cull.
| Input | Behavior |
|---|---|
| Hold Space | Opens the Quick Menu while the key is physically held. Releasing Space closes it. |
| RMB in an idle viewport | Also opens the Quick Menu when no active tool is using right-click for a context action. |
This table combines global, temporary and context-sensitive inputs. Specialized brushes and Mesh Library placement can override a general modifier when their row below says so.
| Shortcut / gesture | Action |
|---|---|
| 1 – 5 | Select the first five visible slots of the active Sculpting or Paint palette. Reordering the palette immediately changes what these keys select. |
| Ctrl + Shift + LMB horizontal drag | Adjust Brush Size. Drag right to increase, left to decrease. |
| Ctrl + Alt + click | Straight-line continuation in eligible Sculpt brushes, normal Paint color strokes and direct Paint Mask. The end of the previous compatible stroke becomes point A; the click draws a projected A→B stroke and B becomes the next anchor. With no compatible anchor, the click establishes the first one. |
| Shift while Sculpting | Temporary Smooth for ordinary sculpt brushes. Face groups and Curve Tube use Shift for their own actions. |
| Shift while Painting | Temporary Blur. |
| Ctrl while Sculpt/Paint | Temporarily invokes the last selected Mask tool, except while specialized geometry gestures own the input. |
| Ctrl + Alt while temporary masking | Erase / unmask when the straight-line gesture is not active in that context. |
| Alt while Paint | Temporary erase for ordinary paint strokes. |
| Alt while Sculpt | Temporarily flips Add/Sub for signed brushes, or invokes the brush-specific secondary action where that brush owns Alt. |
| W | Move. With a usable mask, transforms the unmasked region with the mask acting as soft protection/falloff; otherwise behaves as the normal transform command. |
| E | Rotate with the same mask-aware behavior. |
| R | Uniform Scale with the same mask-aware behavior. |
| Ctrl + W | Create a SculptGroup from the current mask. |
| Hold Space | Quick Menu in the normal Sculpt Mesh viewport state; pan preview during Clip/Cutter/Slice gestures. |
| RMB idle viewport | Open Quick Menu. Active tools can reserve RMB for their own context action. |
| Hold S + LMB | Rotate Stencil. |
| Hold S + RMB | Scale Stencil. |
| Hold S + MMB | Move Stencil. |
| Paint Mask: LMB double-click mesh | Blur mask locally. |
| Profile: MMB double-click | Reset Profile graph view. |
| Ctrl + Shift + Alt + LMB | SculptGroup visibility gesture: click group to isolate/hide, click empty space to show all, drag empty space to invert visibility. |
| Curve Tube: RMB | Commit the pending tube. |
| Curve Tube: Esc | Cancel the live tube preview or cancel section-shape picking. |
| Pose: RMB | Clear Pose hinge guides. |
| Mesh Library: LMB release | Subtract the posed asset from the sculpt. |
| Mesh Library: Alt on release | Union the posed asset with the sculpt. |
| Mesh Library: Ctrl on release | Insert the posed asset as a separate Sculpt Mesh object without a Boolean. |
| Mesh Library: hold Shift + move | Rotate with horizontal movement and scale with vertical movement while placement position stays locked. |
| Mesh Library: RMB / Esc | Cancel placement. RMB also switches to Select; Esc keeps sculpt mode. |
| Ctrl + Z | Normal scene Undo for committed edits. |
The following commands are useful for creating a Sculpt Mesh and controlling optional stroke history from scripts.
| Command | Purpose |
|---|---|
convertToSculpt $ | Converts the current selection to Sculpt Mesh. |
SculptMesh.History = true | Enable stroke history recording. |
SculptMesh.History = false | Disable stroke history recording. |
SculptMesh.HistoryClear() | Clear recorded history. |
SculptMesh.HistoryCreateAnimation() | Create animation from the recorded sculpt history. |
SculptMesh.HistoryCount | Return the number of recorded history entries. |
SculptMesh.HistoryMemory | Report the memory used by the current history. |
Drag your five most-used Sculpt or Paint items into the first five visible palette slots so 1–5 match your workflow.
Besides brush protection, masks can drive Move, Rotate and Uniform Scale and protect Smooth, Gravity, FOV, Bevel and Projection.
The Revert brush needs a Surface Snapshot at the level you want to restore toward.
Remesh/Retopology, Close Holes, Attach, Detach, Cutter, Slice and Mesh Library booleans can replace or restructure topology. Finish important layer/mask decisions before them.
The Modify-panel Displace rollout writes to the highest Multires level. Add enough subdivision first if the map contains fine detail.
Bake Maps uses Level 0 as low poly, the highest level as high poly and UV channel 1. Use Auto Unwrap when Level 0 does not already have suitable 0–1 UVs.
Use Mesh Library sub-folders as categories, keep common assets in Favorites and generate thumbnails from the asset context menu when needed.
| Symptom | Check |
|---|---|
| Brushes do not start | Confirm the selected object is a Sculpt Mesh, the floating menus are open and a Sculpt or Paint item is active. |
| 1–5 or W/E/R do nothing | Finish text entry, then click the viewport or Sculpt Mesh UI so keyboard focus returns to the plugin. |
| Revert does not have a target | Capture a Surface Snapshot at the current Multires level. |
| Curve Tube section cannot be picked | Use a closed spline. Cancel the picker with RMB or Esc and try again if needed. |
| Quick Menu does not open with Space | Check whether Clip, Cutter or Slice currently owns Space for preview panning. Also make sure Sculpt Mesh is the active viewport workflow. |
| RMB does not open Quick Menu | Some active tools reserve right-click: Pose clears hinge guides, Curve Tube commits a pending tube, and Mesh Library placement uses RMB to cancel. |
| Mask click does something unexpected in empty space | Empty-space mask gestures operate on visible geometry: click toggles, Alt+click clears and drag inverts. In persistent Sculpt/Paint, hold Ctrl for the same operations. |
| Paint layer image import is unavailable | Right-click a Paint layer, not a Sculpt layer. |
| Voxelize Mesh is disabled in Remesh | Voxelize requires 3ds Max 2024 or newer. Retopology is a separate path in the same rollout. |
| Retopology does not produce a result | Make sure the 3ds Max Retopology component is available, then retry with a reasonable target face count. Ctrl+click Retopology requests the Instant Meshes engine. |
| Detach / Extract reports no masked faces | Paint a mask on the region first. Detach also cannot remove the entire source surface; use Extract when the whole surface is masked. |
| Attach is waiting for input | Click another mesh in a viewport to merge it, or use RMB to cancel the pick. |
| Displace is too soft or blocky | Subdivide first. The Displace rollout writes its result to the highest Multires level, so fine maps need enough vertices. |
| Bake Maps writes nothing / reports invalid UV coverage | Level 0 needs valid UV channel 1 covering the 0–1 texture space. Run Auto Unwrap or supply suitable UVs, then bake again. |
| Mesh Library asset has no preview | Right-click it and choose Generate Thumbnail or Regenerate Thumbnail. |